My Tea Planner
  • Home
  • About/Blog
    • Who We Are
    • Our Credentials
    • Tea Travels - Rose's Blog
    • Cakes and Tea - Kathleen's Blog
    • Contact Us
  • The Tea Book
    • The Road Back to Civilization
    • A Brief History of Tea
    • Philosophy of Tea >
      • Harmony
      • Humility
      • Respect
      • Creativity
    • Guidelines for the Host/Hostess >
      • Gathering and Greeting
      • Sharing Stories
      • Sharing Food
      • Sending the Guests Home
    • Guidelines for the Guest >
      • Respect Your Hostess/Host
      • Bring a Gift if You Wish
      • Practice Humility
      • Monitor Your Conversation
      • Arrive with a Grateful Attitude
      • Help if Help is Needed
      • Do Not Criticize
      • Leave Gracefully
      • Send a Thank You Note
    • A Checklist for Planning a Tea Party
    • Teas of the World and How to Make Tea >
      • A Sampling of Teas
      • Herbal Teas and Tisanes
      • How to Make Tea
      • Making Iced Tea
      • Tea Concentrate
      • Brewing Tea for a Crowd
    • Tea Utensils and Accessories >
      • Tea Kettle
      • Tea Pot
      • Tea Cozy
      • Teacups
      • Plates
      • Silverware
      • Teacart
      • Tea Strainer
      • Tea Infuser
      • Three-Tiered Server
      • Cream Pitcher and Sugar Bowl
      • Cake Pedestal
      • Trifle Bowl
      • Jam Pots
      • Serving Dishes, Platters, and Trays
      • Silver Tea Set or Silver Tray
      • Linens
      • Kitchen Equipment for Food Preparation
    • Tea Menu Basics >
      • Sandwiches and Savories
      • Savory Spreads and Dips
      • Scones and Tea Breads >
        • About Lemons
    • Afternoon Tea and the Four Seasons >
      • A Spring Tea
      • An Outdoor Summer Tea
      • An Autumn Afternoon Tea
      • A Winter Afternoon Tea
    • A Calendar of Tea Parties >
      • January: A Japanese New Year’s Tea
      • February: A Valentine’s Day Tea
      • March: A St. Patrick’s Day Irish Tea
      • April: An Easter Tea
      • May: A Mother’s Day Tea
      • June: A Wedding Reception Tea >
        • Lemon Yogurt Wedding Cake
      • July: A Picnic Tea
      • August: A Family Reunion Tea >
        • A North American Family Reunion Tea
        • An Eastern Mediterranean Family Reunion Tea
        • A Kosher Family Reunion Tea
        • A Scandinavian Family Reunion Tea
      • September: An Ozark Farm Harvest Tea
      • October: A Tea to Honor Our Ancestors (Dia de los Muertos)
      • November: A Post Thanksgiving Tea
      • December: A Christmas Tea >
        • In Defense of Fruitcake: Fruitcakes and Candied Fruit
    • A World of Tea Parties >
      • A Chinese Dim Sum Tea
      • A Portuguese Tea
      • A Classic British Afternoon Tea
      • An Indian Chai Party
      • A California Tea
      • A Hawaiian Tea
      • An Italian Tea
      • An American Southern Tea
      • A Russian Tea
      • A French Afternoon Tea
      • A Kosher Tea with Tradional Jewish Foods
    • Afternoon Tea for Special Occasions >
      • An Afternoon Tea for Children
      • A Tea for Our Elders
      • A Honey Bee Tea in the Garden
      • An Urban Tea on the Go
      • Tea for One
      • Afternoon Tea for a Large Group
      • A Vegan Tea
      • A Rose Tea
  • Purchase Recipes
  • Resources
    • Bibliography and Resources
    • Menu and Recipe Index
    • Commercial Food Products
    • Glossary

Cakes and Tea

Kathleen's Blog

June/July 2023 - A Revisit to the Picnic Tea Section from Our Book, Sharing Tea: The Road Back to Civilization

6/1/2023

2 Comments

 
Picture
 
I am very proud of our book, Sharing Tea: The Road Back to Civilization and sometimes want to dip into Rose’s gentle teachings of the soulful way of tea and explore the tea party menus we came up with all those years ago. With my poor memory, I’m pleased and frequently surprised with the creative and delicious recipes!
​
One of the menus from A Calendar of Tea Parties section which is seasonally appropriate is the July: A Picnic Tea. We grew up with the trusty green wicker Hawkeye brand picnic basket and green metal Coleman water jug accompanying us to family picnics on the beach or in local parks. Back then, people brought their own plates, cups, and flatware to picnics and picnic-potluck events. With that in mind, the only disposable things I’m packing are paper straws. I’m happy to rinse off plates there and bring home to wash, that’s how our grandma’s did it.
   
Picture
Picture

Since Dad was a high school teacher, we went to lots of history department get-togethers, many BBQs and picnics, always toting along a full basket. The wicker picnic basket stored pastel plastic mugs and matching compartmentalized plates so your potato salad wouldn’t mix with your pork n’ beans. At a big group beach picnic when I was five, I can still remember the sweet and tangy taste of Mrs. Slavich’s enormous strawberry and whipped cream dessert that seemed as big as the biggest cookie sheet; I can’t even imagine how she got it down to the beach!

When I moved out of the house, I commandeered the picnic basket, and it continues to live as a side table, a decorative piece, and yes, as its original purpose, to transport picnic food in an attractive and traditional manner to outdoor events near and not so near.

For this June blog, I thought I would make a few items from the picnic tea menu and go on a picnic to photograph the results. I’m planning this picnic earlier than July since far Northern California gets roastingly hot by then. At the seashore, a July picnic is perfect, as long as you bring blankets because the fog is likely to roll in before you’re done. Part of the fun of any outdoor gathering is rolling the dice with Mother Nature for perfect or even reasonably pleasant weather, hopefully with a minimum of insect intruders. 
​
Here is the link to the menu on our website, with descriptions of each recipe: Menu for July A Picnic Tea

Cold Fried Chicken Drumettes
Lobster Subs or Banh Mi Sandwiches
Deviled Eggs
Curried Carrot Raisin Salad
Garden Green Bean Bundles
Pete’s Coleslaw Cups* 
Cream Scones with Blueberries & Honey Butter
Apricot and Plum Jam Bars
Brownies
Vanilla Bean Sugar Cookies
Blackberry Slab Pie
Sweet Tea, Minted Lemonade, Sparkling Water, White Peach Coolers


*Omit if choosing Banh Mi as they have slaw-like veggies right on the sandwich

 
I think I’m going to make chicken drumettes, deviled eggs, Pete’s Coleslaw (not in cups,) orange scones with honey butter, apricot jam bars, blackberry slab pie, watermelon, and the first cherries of the season. In place of Suzi’s fabulous sugar cookies, I’m showing off my new Walker’s shortbread tins, commemorating the late Queen Elizabeth, happily filled with the all-butter shortbread. Last winter, I could not resist ordering the set of two tins, with vintage photos of the young Queen. I have no defense for this extravagance save the true excuse that I do use pretty tins to store my baked goods. If you’d like to join me in this decadence, I believe the shortbread tins are still available here: Walker's Queen Elizabeth II commemorative tin set
​​
Picture
Picture
No matter how hot it is outside, I always want hot tea with my scones, so I packed basic tea-making gear. Above, see my tea canister, urging us to keep a stiff upper lip, British style, and cups of tea in restaurant ware china pattern Strawberry Hill Pink by Syracuse. Suzi lent me the vintage tablecloths, and her aqua blue tea kettle fits perfectly atop the green and white enamelware 1940s Dutch spirit stove. 

​I am going to make a beautifully red cold drink, too, iced Jamaica tea (technically an infusion because no actual tea is used but we’ll use “tea” for simplicity’s sake) which is as refreshing as it is vibrant. It was introduced to me back on the ranch, in Aromas, California, by one of the ranch mates, Lizette. I see her now, on a hot summer afternoon, clad in a floral sarong, holding a big glass pitcher of dark red liquid, pouring glasses for everyone, always lit up will a big smile. She was kind enough to share the recipe with me and I will share it here with all of you.
 

Lizette’s Jamaica Iced Tea 
From Lizette:

 “It's super simple!
 Rinse 2 cups of dried hibiscus with cold water a couple of times to remove any bits of dirt or sand. 
 In a large pot, bring 8 cups of water to a boil. Add Jamaica and reduce heat, simmer for 5 minutes. Remove from heat. Add 1 cup of granulated sugar while warm and stir a bit to dissolve. Let cool. 
 
Once cool, strain the liquid into a separate container. You can keep this in your fridge and when you're ready to serve, dilute it with cold water with a 1:1 ratio of water to Jamaica concentrate.”
 
It is so good! Less sweet than many cold beverages and more complex and interesting than the usual iced tea. Lizette tells me that her mom added Ceylon cinnamon sticks with the Jamaica flowers to add a spicy dimension.

​
Red drink is a staple at Juneteenth celebrations which is explored further in this fascinating piece: Serious Eats article. The author, Janel Martinez, discusses the roots of red drink in places such as, Ghana, Senegal, Nigeria, Jamaica, and Latin America. It is made by steeping the dried calyx of the Hibiscus sabdariffa flower in water then sweetened with honey or cane sugar and sometimes blended with spices and or wine or rum. Ms. Martinez points out, “When the transport of enslaved Africans across the Atlantic began in the early 1500s, livestock and plants like hibiscus also made the voyage.” 
 
In the American south, the plant was cultivated in kitchen gardens, ensuring a beloved piece of the homeland survived and could be harvested and used. The high concentration of vitamin C and other antioxidant properties including the rich red hue from anthocyanins contributed to its spread and popularity in temperate Latin American climates. I purchase the dried Jamaica flowers in bulk at my local Mexican grocery store, and they are available in packages in most well-stocked markets. 
​
Picture
The picnic basket serves as a makeshift bar for pink lemonade and Jamaican iced tea in glass milk bottles with Grandma’s metal tumblers, paper and metal straws, and a beehive carafe covered with a doily made specifically to keep pesky insects out. Rose gifted me with the lacy, beaded covers and they add such charm to outdoor parties. Glass milk bottles with their snug-fitting caps, work really well in ice chests, as they are sturdy and keep beverages really cold. I use the pint-size bottle for milk for coffee and tea during camping trips.
 
​ 
I chose nearby riverside Lake Redding Park for my picnic spread. Arriving early, it was just me and the resident Canadian geese. The Sacramento River provided a nice view and cool breeze and shortly, along came several dog-walkers and joggers. As there was no lake in evidence, I asked longtime north state resident Mr. Vazquez why the park was called “Lake Redding.” He told me that before Shasta Dam was built in the 1930s, the city would temporarily flood the river to make room for the annual Water Carnival. The City of Watsonville used to do the same to the Pajaro River and I had seen festive old photos of boat parades, regattas, and elegantly dressed couples taking in the spectacle. 
Picture
Picture
Picture
Clockwise from upper left: Redding Historical Society provided photo from the 1920s Water Carnival, bandstands set up next to the river, a modern-day pair of geese at the boat ramp, train trestle in the background, and Fourth of July celebration showing the Pajaro River dammed up to make Lake Watsonville for a similar water carnival. The Pajaro Valley Historical Association reports that it was rebuilt each summer from 1907 to 1914. 

World War One put an end to the damming of the Pajaro River, and the Redding Water Carnival was discontinued due to the water temperature being dropped by the building of Shasta Dam. So, no more crazy but spectacular water fun times for our California rivers but we can still pack a pretty picnic to enjoy rivers and parks. And well, because picnics are all about the food, right?
 
Picture
The main course, plated up on vintage picnic ware, showing off Pete’s colorful coleslaw, tarragon deviled eggs with cornichon, watermelon, and chicken drumettes. The weather already quite warm, we have mugs of water along with Jamaica iced tea and pink lemonade. I brought water in the beehive carafe and an extra refillable water jug, so we’d have plenty to drink and rinse off the dishes.
Picture
Clockwise from top left, sweet course of blackberry slab pie, the season’s first cherries, apricot jam bars, hot tea, plated serving of the goodies, and a tin of scones with honey butter, all on Suzi’s charming geranium tablecloth.
Picture
Above, picnic sweets in the shade, showing off the fancy shortbread in one of the Queen Elizabeth II tins. Below, scones, slab pie, and apricot jam bars, waiting to be boxed up for their trip to the picnic.
​

Picture
Picture
Above, the blackberry slab pie before baking, showing a makeshift foil “barrier” to make my square pan into a rectangle. I cut down the recipe because we were serving just a few guests. Below, the vintage tablecloths sunning on the line and the picnic basket ready to pack.
​

Picture
Picture
Above, along with lots of water, don’t forget to pack forks, spoons, lots of dish towels, and a knife; a Swiss army knife is a great addition. Below, the train came by!
​

Picture

​I hope you found a bit of inspiration for your own picnic this summer; I had a lot of fun both planning and going on my local park picnic. I’m sure there is a sweet spot near you that would make a great picnic location, possibly even your own backyard. Have a wonderful summer and see you back here in the autumn.
A Thank You Note
In reviewing the photographs, planning the menu, and researching and writing this blog, I am reminded again and again how lucky I am to have all these beautiful friends and family members in my life. I am surrounded with kind people who are always happy to give me their time and experience, loan me their precious linens, dishes, and recipes, edit my rambling drafts and generally be sincere cheerleaders for my creative work. From my heart, I thank you all so much. 

Picture
2 Comments

May 2023 - Fresh Inspiration with a New Ingredient

5/1/2023

3 Comments

 
Picture
My Grandma Murdock’s rimmed wild rose platter put to excellent use here for the Raspberry Flan Bundt Cake

Picture

​Back in the day, if you wanted to color a baked dessert vibrant red or deep pink, your choices were red food color or red packaged gelatin powder. While neither of these options was terrible, they did leave room for improvement. 

Enter freeze-dried berries which can be ground up in a coffee or spice grinder to make very intensely flavored, brightly colored berry powder. I was first made aware of the existence of freeze-dried berries from a cooking teacher who was flavoring French macarons with raspberry powder. She bought it in giant cans at a big box store which dampened my enthusiasm for them, as only a very small amount was needed for each recipe (and I don’t really like macarons.)

Luckily, our good friend Trader Joe has started carrying small bags of freeze-dried strawberries and mixed berries in the dried fruit aisle, as they are meant to be eaten right out of the bag. They are indeed a very intense berry snack, but I am using them for their natural coloring and ability to add berry flavor without adding moisture to baked goods. These properties suggest many possibilities and have led me to adapt two recipes which have quickly become favorites.
​
My first venture using crushed strawberry powder was in a recipe for Neapolitan biscotti, three flavors of dough braided to make pink, chocolate, and vanilla swirled biscotti. You can find the original recipe here: Neapolitan Biscotti recipe
​
Picture
​From the website Recipes Inspired from Mom, blogger Cindy’s Neapolitan Chocolate Chip Biscotti photo
Picture
My biscotti dough, sans sour cream, chocolate chips, and sparkling sugar on top.

I streamlined the recipe to omit the sour cream and chocolate chips and then combined her three batches of dough into one big batch, then divided it into thirds to flavor. Feel free to use whichever way makes more sense to you.
​
These strawberry, chocolate, and vanilla flavored biscotti are really delicious, and like most biscotti, keep fresh for a long time. The real strawberry essence comes through unlike any artificially flavored berry would, and the traditional combo of chocolate-vanilla-strawberry is so pleasing, putting tasters in mind of Neapolitan ice cream in Grandma’s little depression glass dessert dishes, so charming. The only thing that I was not immediately happy with was how the strawberry flavored dough baked into a less vibrant, more pinky-brown color, after the second bake. After trying a lower oven temperature, covering the cut biscotti with foil loosely during the second bake, and monitoring them very closely, they came out an acceptable color. Not quite as pink as I’d hoped but “pink enough” for me.

Picture

My next dried berry experiment was a complete hit, right out of the gate. You know how we are told to not try out a new recipe for guests? Well, I figured family doesn’t count as guests, so I made a Bundt with raspberry flavored flan on top and white cake on the bottom for a family party in early April. The Choco flan cake recipe that has been such a hit for the last several years, had supplied me with earlier inspiration, last autumn, when I found a recipe which switched the chocolate cake layer for spice cake and flavored the flan layer with pumpkin puree. It makes a delightfully autumnal dessert and I featured it in my November 2022 blog. Click here for that blog post with a photo of the cake: Cakes and Tea, November 2022 blog and here is that delicious recipe from Southern Living magazine: Pumpkin Flan Bundt Cake

​For the springtime pink cake I was imagining, I swapped the chocolate cake mix for white cake mix and to the flan mixture, I substituted fresh raspberry puree for some of the liquid and added about 2 tablespoons powdered freeze-dried raspberries. When turned out of the pan after cooling and chilling, the pretty pink flan layer sat perfectly on top of the white cake base. I served the pink and white confection on a rimmed platter, in a shallow pool of raspberry puree with fresh raspberries strewn over the top. It is a fairly easy dessert that will make a splash on a Mother’s Day, graduation, or any spring dessert table.
Picture
Picture


​Raspberry Flan Bundt Cake

​This pink and white raspberry cake is the perfect special occasion dessert for spring holiday entertaining. It serves a lot of people, can be made ahead, and looks spectacular. It is tailor-made for May, when berries look so beautiful in the market. This would be a lovely Mother’s Day cake and can be made using strawberries, if mother would prefer that. The strawberry recipe variation can be found directly after the main recipe. To make the berry powder, grind freeze-dried raspberries or strawberries in a coffee or spice grinder. Freeze-dried berries can be found at Trader Joe’s, Target, and Amazon. One bag makes enough powder for 2 cakes or for 1 cake, with snacking opportunities for the baker.     FYI: The recipe uses a total of 6 eggs.

Makes 1 standard size Bundt cake, serves up to 20 guests

Preheat oven to 350◦ F

Special equipment: fine mesh sieve, medium sized bowl, wooden spoon, silicone spatula, standard Bundt pan (usually 12 cups) generously sprayed with baking spray, hand or stand mixer with bowl, electric blender, foil, roasting pan large enough to fit Bundt pan, hot water for water bath, cooling rack, thin knife, rimmed serving platter

Berry puree:
  • 3 (6 ounce each) baskets of raspberries, divided
  • 2 tablespoons sugar, or to taste
  • 1 tablespoon berry or orange liqueur, optional
  • Cake layer:
  • 1 box white cake mix, I used a 15.25 oz. Duncan Hines, but any commercial mix is fine
  • 1 cup water
  • ½ cup canola oil
  • 3 egg whites (the yolks will be used in the flan layer)
  • Flan layer:
  • 1 can (14 ounce) sweetened condensed milk 
  • 2 tablespoons freeze-dried berry powder
  • ¾ cup milk
  • ¼ cup raspberry puree
  • 3 egg yolks
  • 3 whole eggs
  • Optional garnish: Freshly whipped cream
  1. Make berry puree: Set fine mesh sieve over medium bowl. Add 2 baskets of raspberries. Smash berries with wooden spoon to release juice. Scrape smashed berries through sieve, forcing puree into bowl. This may take several minutes. Lightly tap sieve on rim of bowl to help puree release from sieve. With silicone spatula, scrape berry puree from underside of sieve. Discard seeds. Stir in sugar to taste and optional liqueur, if using. Set puree aside. Puree can be made up to 2 days ahead, stored in fridge, tightly covered.
  2. Make cake layer: Preheat oven to 350◦ F. Begin heating water. In mixing bowl, beat dry cake mix, water, oil, and 3 egg whites for 30 seconds on low speed. Scrape sides of bowl and beat on medium speed for 2 minutes, scraping bowl as needed. Scrape batter into prepared Bundt pan. Set aside.
  3. Make flan layer: In electric blender, add sweetened condensed milk, berry powder, milk, berry puree, 3 egg yolks and 3 eggs. Cover and blend at low speed for 30 seconds. Scrape sides of blender, replace lid and blend at medium speed until smooth, about 1 minute more. Slowly pour flan mixture over cake batter. Flan mixture may sink into cake batter but will separate into distinct layers during baking. Do not stir. Spray a piece of foil with cooking spray and with sprayed side down, tightly cover Bundt pan.
  4. Pull out oven rack a little bit and place roasting pan on rack. Set covered Bundt pan in roaster. Carefully pour hot water around Bundt pan, to a depth of 1 inch. Take care to not get water in Bundt pan. Carefully push oven rack in and bake until tester inserted into cake comes out clean, 1 to 1 ¼ hours. Remove from water bath and remove foil. Cool on rack for 1 hour, then chill for 2 hours. 
  5. Loosen edges of pan with thin knife. Place rimmed serving plate upside down over Bundt pan. Holding serving plate and Bundt pan together securely, flip over and remove pan. At this point, cake can be chilled up to 2 days before serving. However, plastic wrap may spoil the look of the delicate flan layer, so covering cake with a large upside-down mixing bowl or plastic cake cover from a bakery cake is advised. 
  6. To serve: remove whatever is covering the cake. Stir reserved raspberry puree and pour around cake. Scatter raspberries from remaining basket over and around cake. Serve in smallish portions, topped with whipped cream, if desired. Chill leftovers promptly.
  7. Strawberry Flan Bundt Cake Variation: Use 3 baskets of ripe strawberries in place of raspberries. In medium bowl, mash 2 baskets of strawberries with sugar and either let sit at room temperature for an hour or microwave for about a minute. If you don’t like seeds, push through the sieve as described in step #1 or if you don’t mind seeds, puree in blender until uniformly smooth. Use ¼ cup puree in flan mixture, as in step#3, reserving the remaining puree for serving, as in step #6. To serve, slice remaining basket of strawberries and toss with an additional tablespoon of sugar or to taste and scatter over and around flan cake. 
    ​
Picture
A recent favorite photo of mine, remembering the late Queen Elizabeth II   with some of the gorgeous flowers leftover from our spring tea party.
3 Comments

April 2023 - Spring Tea Party

4/1/2023

2 Comments

 
Picture
Santa Cruz, California
Picture

Menu


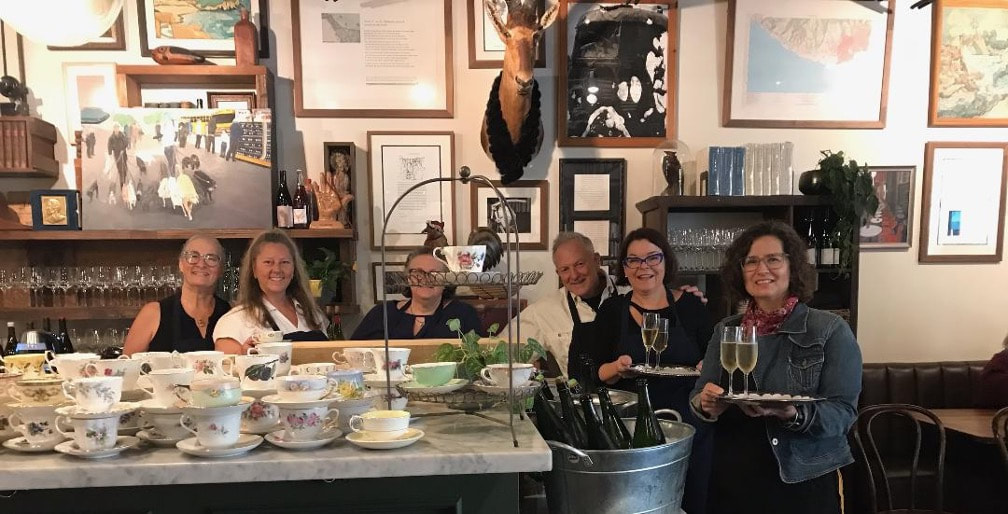
​Salmon Mousse in Toast Boxes
Beet-Pickled Deviled Eggs
Chutney Cheese Spread on Country Rye and Baguette
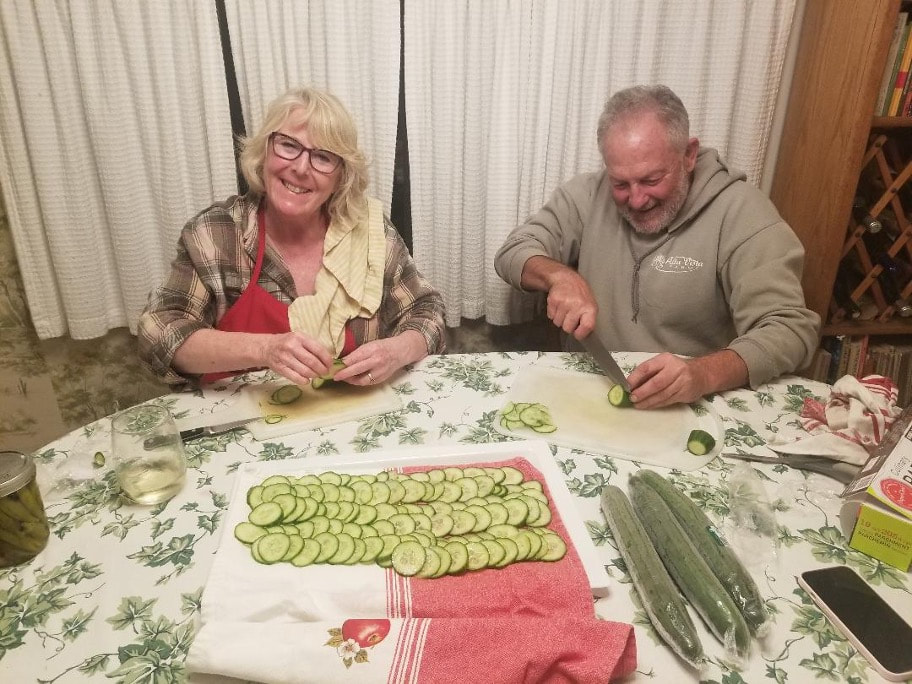
Cucumber Sandwiches
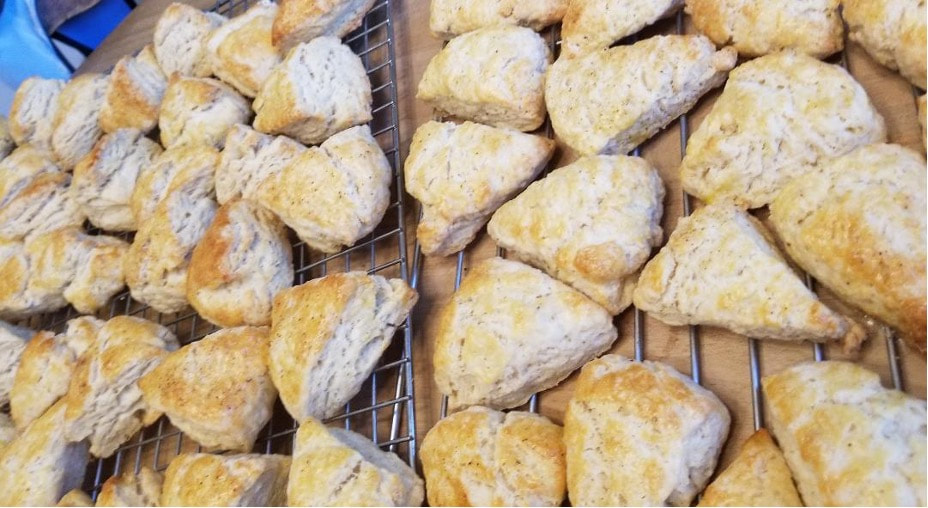
Scones with Organic Lemon Curd
Neapolitan Biscotti ◊ French Macarons
Blood Orange Poppy Seed Shortbread
Pink Grapefruit Pie
Spring Pistachio Cakes
Champagne ◊ Black Tea

​
Picture
Picture
Picture
Picture
Picture
Picture
Picture
Picture
Picture
2 Comments

March 2023 - Team Savory

3/1/2023

3 Comments

 
Picture
​Above: Peggy and Kristin, at one of the Hidden Valley String Orchestra receptions, Suzi and Kristin, at the first Biscuit-Off! Competition, mini pretzel bun turkey sandwiches, the famous mac & cheese, and caramelized onion turnovers with sesame seed-onion topping
​
​If you cook with people for a length of time, it will become clear whether they tend towards the savory food flavors or the sweet. Are they potato chip snackers or cookie cravers? No one must choose between the two, thank heavens, but folks tend to gravitate to one or the other.
While bakers like Suzi and I choose the sweetness of cookies and cakes, our catering partner, Kristin, is the chief of Team Savory. She can always be relied on for gorgeous soups, delicate yet memorable sandwiches, and entrees that are on everyone’s lists of perennial favorites. Her shepherd’s pie and macaroni and cheese are nothing short of legendary. 
For afternoon tea menus, we try to balance the sweet and savory items to achieve a pleasing whole. Previously, I used to favor the sweet side of the menus simply because I enjoyed creating the miniature jewel-like fancies that crown the top of the 3-tiered server. That said, the older I get, the less I want to eat so many sweets and would rather graze the savory course. When going out for afternoon tea, we’ve tended to take most of the sweets “to go” as we have eaten more of the scones and sandwiches. I am recognizing the deep contributions of our Team Savory.
 Moving forward in tea menu planning, we’ll be looking for ways to beef up, pardon the pun, our savory offerings. One easy way to get more umami into our menus is to add a savory scone. Even sweet scone aficionados find these scones delicious and now count them on their list of favorites. A wonderful intersection of sweet and savory happens when jalapeno jelly is served with them. 
Here at My Tea Planner, we have many recipes at all skill levels for sweet and savory foods that will enliven your tea menus and spark your imagination. As we celebrate Saint Patrick’s Day in March, check out our proposed Irish-American menu here, St. Patrick's Day menu and browse our sandwich, savory tart, salad, and spread recipes. 
In preparing for this blog, I came up with a list of foods that could be modified or miniaturized to fit into a tea menu with the thought that I would do some recipe testing and photos of any good ones. My guiding thought was, would Team Savory approve of this dish? With that in mind, here is my rough list: miniature British pork pies, small empanadas or samosas, Scotch eggs made from quail eggs, cheese and cornichon sandwiches, and individual shepherd’s pies. 
However, before I could launch my testing project, I got the news that our captain of Team Savory, Miss Kristin, will be departing Northern California for the east coast. I’m glad we don’t have any big tea parties scheduled as it will be impossible to replace her. While we are so happy that she is starting a brand-new adventure, she will be sorely missed during fun catering times and all the other extremely fun times between tea parties. From everyone on Teams Savory & Sweet, at Dancing Starfish Ranch, and all the friends in NorCal, we wish Kristin bon voyage!
Picture
Picture
 Above: Kristin making pumpkin soup for a fall tea and with our darling friend Marie, at a Christmas card party
Picture
Picture
​Above: Kristin in two iconic NorCal spots: the McCloud Hotel, near Mt. Shasta and Nepenthe, Big Sur
Picture
3 Comments

February 2023 - Love & Chocolate

2/1/2023

1 Comment

 
Picture
Picture

Love & Chocolate
 
Chocolate. Love. Chocolate. Love. Chocolate. Love. Chocolate. Love. Chocolate. 
Christmas really does slide right into St. Valentine’s Day for me. The big holiday season that starts with Thanksgiving turns to early birthday season then January which turns into late birthday season which goes until Valentine’s Day, whew! I try to have a month or so in which I work on my yearly V-Day art projects, create some new work, frame some old work, and play with some new chocolate desserts.
Chocolate lends itself to celebrations of love. Chocolate melts at body temperature which makes it extremely pleasant to eat, and dark chocolate releases chemicals in the brain that makes you feel happy, even mimicking the feeling of falling in love. A box of high-quality dark chocolates is one traditional gift that is science-approved as well as delicious. 
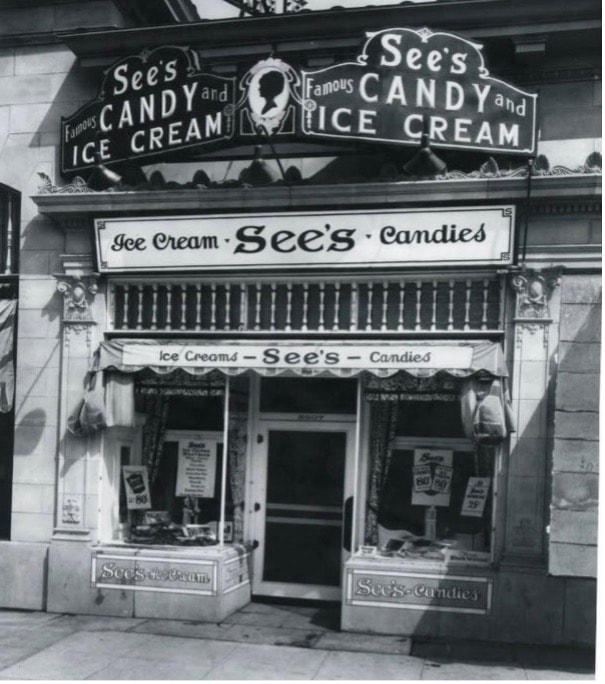
As a baker, I’m drawn to miniature chocolate desserts, heart-shaped cookies, and creamy mousses. I’m not usually a candy maker; I leave that to Suzi and our good friends at See’s Candies. But after Christmas, I was left with a huge jar of maraschino cherries and lots of white chocolate. That lead me to make white chocolate fudge. Since I am not a big fan of maraschino cherries, I made two batches, one with dried cherries and toasted pecans for home and one batch with toasted almonds and chopped maraschino cherries to send to Rose, in Hawaii. The dried cherry batch was yummy and cut perfectly to package in little gift boxes. However, the batch with the maraschino cherries oozed cherry goo when it was cut. I surmised that by the time it arrived in Hawaii, it would have become a sticky mess. It did taste delicious, though, and it seemed a shame to waste it.
I mused on it for a few days, the sticky fudge well-wrapped in plastic wrap in the refrigerator. Though I had drained the maraschino cherries overnight in a sieve and patted them with paper towels, I probably did not dry them enough. If doing it again, I would cut the cherries in half and lay them out on paper towels, cut side down and pat dry with more paper towels.
​ 
Picture
Picture
Picture
My next thought was that baking the fudge into a batter could also solve the stickiness problem. It was so pretty to look at, it seemed a shame to hide it inside a cupcake or other solid batter. I hit on the idea of making it the center layer of a multi-layered dessert: dark chocolate cookie-like bottom, a thick center layer of the fudge, and a brownie top. 

Since I wasn’t thinking ahead to Valentine’s Day heart shapes yet, I figured making them in the 2” removable bottom cheesecake pans would be just the right size and easier to get out of the pan, if the fudge layer stuck to the sides.
​
I rolled out the chocolate crust and cut it with a 2” round cutter and fit it into the bottom of the wells. Next, I cut out the fudge with the same cutter and put one round on top of each crust, pressing down gently to make sure there were no air pockets. Finally, I made a half batch of brownie batter and spooned about 2 tablespoons over the fudge, smoothing the tops. Though I sprayed the pan with baking spray, they were difficult to remove. Making them in a pan and cutting afterward would be a much better way to go. A little bit of pink glaze finished them off nicely. 
​
Picture
In later versions, I baked the crust-fudge-brownie desserts in an 8” by 8” square pan, cutting them after they were well chilled. This made a nice, clean cut. My friend Polly saw the first batch with the pink glaze and christened them Fudge Buttons, so I added two dots to the above version. The hearts won the tic-tac-toe game above, but they all taste good.
​
I have written all the recipes you need to make these decadent desserts as well as a suggested timetable plan to make them in manageable steps. Separately, the three recipes are good to have on hand when you want to make a simple batch of white chocolate fudge, a small batch of brownies, or have a reliable chocolate crust recipe. Either way, I hope you can get some chocolate into your St. Valentine’s Day this year and every year. As my grade school teachers taught us, make sure to give a valentine to everyone, so no one feels left out. Still pretty good advice, but if you’re not up to that, a little chocolate for everyone is a great substitute. 
​
Happy Valentine’s Day All!

Picture
2023 St. Valentine’s Day display featuring my favorite cherry photograph, by Paul Burkholder. Other valentine collages and painting by me. Peggy Sue gifted me with the cool arrow dish. The found metal cog arch is a gift from Mr. Vazquez, who knows how much I love weird metal stuff. And I don’t want to brag, but check out my new thermostat!
 
Simple White Chocolate Fudge
Makes 8” by 8” pan
Special equipment: microwave-safe mixing bowl, silicone spatula, 8” by 8” pan, lined with parchment or foil, cutting board, sharp chef’s knife or small circle and/or heart-shaped cutters
  • 3 cups white chocolate chips or 18 ounces chopped white chocolate or white candy melts
  • 1 can (14 ounces) sweetened, condensed milk
  • 2 tablespoons butter
  • ¼ teaspoon almond extract, if desired
  • 1 to 2 cups chopped, toasted nuts
  • 1 cup dried cherries, roughly chopped if large 
  • or 1 cup maraschino cherries, halved, drained, and patted very dry 

  1. In microwave-safe bowl, combine white chocolate, condensed milk, and butter. Microwave for 1 minute and stir. Continue to microwave at 30 second intervals, stirring each time, until mixture is melted and smooth. 
  2. Stir in optional almond extract. Fold in nuts and cherries. 
  3. Turn into prepared pan, smoothing top. Chill until cool, about 3 hours.
  4. Turn out of pan and remove parchment paper. With chef’s knife, cut into 1” squares or use cookie cutters to cut into heart shapes and/or circles. 
  5. Store at room temperature, tightly wrapped, for up to a week or chilled for up to a month.

​Chocolate Pie Crust

​This a very versatile recipe to have in your recipe box. It is very chocolatey and is easy to handle. It can be used as the crust for cream pies or cheesecakes or as a base for cookie bars. Any leftover dough can be rolled out and baked as chocolate wafer cookies. 

Makes 9” pie crust
Special equipment: mixing bowl and pastry blender or food processor and scraper, plastic wrap or waxed paper, rolling pin, pie pan, small knife, fork

Preheat oven to 400 degrees F, in step #3
  • 1 cup flour
  • 1/3 cup cocoa
  • ¼ cup sugar
  • ½ cup (1 stick) butter, cut into large pieces and chilled
  • 1 teaspoon vanilla
  • 2 tablespoons cold water 

  1. In mixer bowl or food processor, combine flour, cocoa, and sugar until mixed. Cut in butter until mixture is in pea-sized chunks. Add vanilla and cold water and mix until a rough dough is formed. 
  2. On sheet of plastic wrap, pat dough into a circle. Wrap and chill for 20 minutes or up to 2 days.
  3. Remove dough from fridge and unwrap. Roll into a roughly 12” circle between pieces of plastic wrap or waxed paper to a thickness of about 1/8” to ¼”. Fit crust into pan and trim edges. Prick bottom of crust with fork. Chill for 15 minutes. Preheat oven to 400 degrees F.
  4. Bake in preheated oven for 10 to 12 minutes or until crust feels set. Cool completely before filling.

​​Ghirardelli Brownie Half Recipe
Makes thin brownies in an 8” by 8” pan or standard thick brownies in a loaf pan or similar pan
Special equipment: microwave-safe mixing bowl, silicone spatula, mixing bowl, sieve or sifter, wooden spoon, baking pan, sprayed with baking spray, cooling rack

Preheat oven to 350 degrees F
  • ½ cup (1 stick) butter, cut into large chunks
  • 4 ounces semi-sweet chocolate, chopped or ¾ cup chocolate chips
  • ¾ cup plus 2 tablespoons flour
  • ¼ teaspoon baking powder
  • ¼ teaspoon salt
  • 1 cup brown sugar, lightly packed
  • 1 teaspoon vanilla
  • 2 eggs
 
  1. In microwave-safe mixing bowl, melt butter and chopped chocolate in microwave in 30 second intervals, stirring between heating. Stir until smooth.
  2. Sieve flour, baking powder, and salt into mixing bowl. Set aside.
  3. Using wooden spoon, stir brown sugar into chocolate mixture. Stir in vanilla and eggs. Stir just until smooth.
  4. Scrape into prepared pan and bake for 15 to 20 minutes, in 8” by 8” pan or 20 to 25 minutes in loaf pan. Cool in pan on cooling rack. Cut into squares. Brownies keep, tightly wrapped, at room temperature for a day or two. Freeze for longer storage.
    ​
Picture
 
Suggested Timeline: 
  • Make fudge, anytime from 3 hours to one week ahead.
  • Make pie crust dough from 1 hour to 2 days ahead.
  • On serving day, make the brownie batter, up to 30 minutes ahead.
  • Assemble as directed below.
  • Best served day they are made.
 
Layered White Chocolate Cherry Desserts aka Fudge Bottoms

Makes one 8" by 8” pan

Preheat oven to 350 degrees F

Special equipment: cutting board, rolling pin, small knife, 8” by 8” square pan, lined with parchment paper or foil, silicone spatula, cooling rack, chef’s knife to cut into squares or small circle and/or heart-shaped cutters
  • 1 recipe Simple White Chocolate Fudge, cooked, chilled, and uncut
  • 1 recipe Chocolate Pie Crust dough, chilled
  • 1 recipe Ghirardelli Brownie Half Recipe, made up to Step #3 (uncooked batter)
  • 1 recipe Basic powdered Sugar Glaze
 
  1. Turn out fudge onto a cutting board. Peel off parchment paper. Set aside.
  2. Roll out pie dough to a thickness of about 1/8” to ¼” trim to fit into bottom of prepared 8” by 8” pan. (Keep scraps to bake into wafers, if desired.)
  3. Fit fudge slab on top of pie dough, pressing lightly to nestle into the corners. 
  4. Spread brownie batter over top of fudge with spatula. Bake for 30 to 35 minutes or until center is firm to the touch and completely set. These need to be baked longer than traditional chewy brownies in order to make clean cuts with knife or cutter.
  5. Cool on rack until completely cooled then chill for 2 to 3 hours until very firm. Turn out unto cutting board. Peel off parchment paper. If cutting into squares, glaze thinly with basic powdered sugar glaze. Chill until glaze is firm then cut into squares with chef’s knife. (If using cookie cutters, cut out circles and/or hearts then glaze each one with basic powdered sugar glaze.)
  6. Serve immediately or store in air-tight container. Best served the day they are baked but can be kept chilled for a day or two. I would not recommend freezing them.

​Variation: If cutting into shapes, there will be leftover cut pieces and crumbs. These can be put into a food processor and lightly pulsed a few times to make sticky crumbs. These can be formed into balls by hand to make truffles or cake balls. Use small lollipop sticks to make cake pops. Chill balls until firm. Roll truffles in chopped, toasted nuts or cocoa. Cake pops can be dipped in basic powdered sugar glaze, setting on a rack to dry. Chill truffles or cake balls until serving time.

Basic Powdered Sugar Glaze
​

  • 3 cups powdered sugar, sifted if lumpy
  • 3 to 4 tablespoons water or milk
  • food color to make pale pink
    ​

Picture
Picture
​In a mixing bowl, stir 3 tablespoons water into powdered sugar. Stir in more water, if needed. Color with drops of pink or red food color until desired shade of pink is reached. I like to make a fairly stiff glaze, then melt slightly in the microwave. The goal is to have the glaze set up and dry to the touch, when served. 
​
Picture
​“Cerise, 2007 Paris Street Market” Paul Burkholder
Picture
Picture
1 Comment

January 2023 - Scones 101

1/1/2023

3 Comments

 
​Tips and Step-by-Step Photos of Basic American-Style Scones
Scones are a much beloved and anticipated feature of British afternoon tea. The rise of the British Empire spread afternoon tea traditions the world over. A scone in New Zealand may be similar to a scone in Scotland or India. In America, we have done our American thing with making scones larger and having more additions and flavors and glazes. British scones are of a modest size, dark golden on the top, and usually round. Inclusions, if any, are currants or raisins. The ratio of flour to fat is lower and eggs may or may not be added. The common British practice of generously topping scones with clotted cream and preserves or lemon curd may explain why plainer scones are preferred.
To confuse us even more, recipes naturally grow and adapt to local tastes and conditions. We may think we are making grandma’s recipe but the ingredients she may have used are no longer available or have been replaced with more modern ingredients. In Britain, two devastating world wars inflicted food shortages that affected what was possible and popular. Scones, as are other tea time treats such as soda bread, shortbread, and crumpets, are made from pantry staples that most cooks would have on hand. 
Sometimes, I hear people speak of scones in a dismissive way as dry or hard, and indeed texture is a key factor in a proper scone. As I was taught, the ideal texture of American scones was almost like shale in its layered structure, not cakey or overly dense. Scones are not muffins. If the scones found in coffee shops around the country suffer from a seeming dryness, it’s probably because they are stale. Scones should be freshly baked as close to the time of serving as possible. Many seasoned hostesses, such as Rose, put the scones in the oven as the first guests are arriving, ensuring warm scones as soon as guests are seated.
Having baked for large afternoon tea catering jobs, I learned to make the scone dough, shape and cut into wedges or rounds, then freeze the scones before they are baked. They are transported still frozen then placed on baking sheets to be baked without defrosting. Depending on the size of the scone (I tend to make tea scones fairly small) the baking time increases by only a few minutes. This method enables hostesses to have freshly baked scones ready anytime. Contrary to what you might think, this actually improves the texture of the finished product. 
I’ve photographed each step of the scone-making process, from gathering ingredients right through to baking. When teaching baking, I find that if students bake several batches very soon after learning, the retained information becomes part of their baking repertoire. I highly recommend making a date with yourself once or twice a week to practice your scone skills until you feel very comfortable with the process. Scones freeze very well, baked or unbaked, so you never have to worry about having too many scones around. 
Equipment: mixing bowl, sieve or sifter, pastry blender or table knife, fork, pastry marble or clean work surface, bench scraper or chef’s knife, pastry brush, baking sheet lined with parchment paper, cooling rack
​
Picture
​Step 1: Gather your ingredients. For these photos, we are using cold butter, cut into chunks, flour, sugar, baking powder, baking soda, salt, and buttermilk. Pastry blender and fork are at the ready. If you are working in a hot kitchen, don’t hesitate to pop the dish of butter into the fridge to keep chilled. Full disclosure: I only do this kind of ingredient setup when I am teaching or taking photos. Normally, I would get all my dry ingredients out and measure directly into the sieve. I put away each dry ingredient as I use it so I will know I already added it.   
Picture

Step 2: Sift dry ingredients into a mixing bowl. 
​
Picture

​Step 3: Add chilled butter to dry ingredients and cut in with pastry blender.     
 
​
Picture

Cut the butter into the flour until the biggest chunks are about the size of small peas and the smallest chunks look like cornmeal. The variation in butter size is what gives the scones the layers.
​
Picture

Step 4: Switching to fork, stir the buttermilk into the flour and butter mixture. Toss together gently, almost like folding egg whites. Your dough should be a 
shaggy mass, like this:
​
Picture
Picture
Picture

Step 5: Turn dough onto a clean surface. (I’m using a pastry marble which helps 
to keep dough cold but a wooden board or smooth counter is fine.) Pat into a rough circle. Add a bit more flour if dough is sticking. 
​

​Step 6: Pat the dough about an inch thick and about 6 or 7 inches across. Using a large sharp knife (such as a chef’s knife) or preferably a bench scraper, cut into four quarters, then slice each quarter into three small wedges, making twelve mini scones.
 
Picture
 
Step 7: Brush tops with cream or egg wash. Sprinkle with sugar, if desired.
​
Picture

Step 8: Bake in a preheated 400 degree oven on parchment-lined baking sheet until scones are golden brown. Cool briefly on cooling rack and serve warm or at room temperature.
​
Picture
​I hope these detailed photos help answer any scone questions you may have had. We at My Tea Planner offer several free scone recipes with which you can practice and expand your deepening scone skills. You can also search our website for recipes for scone toppings such as quick clotted cream, lemon curd, and various jams, chutneys, and preserves. 
Happy New Year!
3 Comments

December 2022 - Holiday Scotties to Keep & Share

12/1/2022

2 Comments

 
Picture

​I do love the chilly part of the year, with the bundling up in cozy sweaters, hats, and tartan plaids. Warm beverages of every description seem much more delicious and downright necessary to a festive and happy existence. Like the rest of the year, we drink and serve coffee and tea daily but now feel the urge to simmer some apple cider on the stove with a few sticks of cinnamon, making the house smell magical or make an evening hot toddy or hot buttered rum. The easiest toddy is simply a little honey or brown sugar stirred into a mug of boiling water to which you add a squirt of lemon or orange and the brown liquor of your choice. I like spiced rum but whiskey or bourbon work perfectly. Feel free to stir with a cinnamon stick or throw in a piece of candied ginger. All us ginger lovers need to check out Rose’s December blog in which she celebrates the warming spice in all its many uses. Here’s a recipe for a batch of rum butter so you can make hot buttered rums whenever the mood strikes: https://www.foodnetwork.com/recipes/rachael-ray/hot-buttered-rum-recipe-1943195.ampThe batter lasts all season in the fridge.
​
Picture

At the Lincoln, California, historical museum, where my friend Merlina and I ducked in before our tea reservations, I spotted this adorable Scottie calendar page from 1938. Luckily, he was in the little gift shop of the museum and I was able to take him home. I’ve always had a weakness for Scottie dogs and their white counterparts, West Highland Terriers or Westies, as they’re known. I was gifted with a dear old Scottie toy dog who had seen better days years ago. He’s resided in my china cabinet, behind glass doors, keeping him safe from dust and little fingers. But with the new Scottie in mind, I decided to make them the stars of my holiday display. (See photos of our wonderful afternoon tea at the Tea Nook in Lincoln, at the end of the blog.)
​
Picture

What could be cuter than a whole string of Westies and Scotties made from long-lasting flour and salt craft dough? A staple of children’s craft projects, salt dough is a cheap and easy modeling medium that anyone can do. Salt dough Christmas tree ornaments are a time-honored Mom gift that with a little extra work, could be made into ornaments not only a mother could love. I found a recipe online that uses ground cinnamon for part of the dry ingredients which makes them smell spicy good, too. However, the recipe calls for ¾ CUP of cinnamon which I did not have in stock. Instead, I mixed up a lot of my “elderly" baking spices including allspice, nutmeg, mace, and some cinnamon. It made a lovely, very holiday aroma. If you are making several batches of the spiced dough, Costco would be a great place to purchase large amounts of ground spice.
​
Picture

Salt dough Scotties in the oven, at low temperature. The recipe recommends turning them over during baking. You can see the salt rising to the top, as the recipe predicts. Remember to cut the holes cleanly, if you plan to hang them on the tree.
​
Picture

Here are my Westies and Scotties,  sprinkled with the appropriately colored glitters. The Westies have their eyes already glued on. You can buy googly eyes, but I used map pins, with the pin part clipped off with wire cutters. Next, I made the Scotties white map pin eyes. When the eyes were securely glued on, I put narrow plaid ribbon “collars" on them. I am not normally a hot glue gal, but hot glue would have speeded up that process immensely. 
​
I attached the Westies and Scotties to a felted garland and hung it with a strand of red ball fringe and a hand-made felt swag from an art buddy of mine. I love how they look hanging together.

Picture

Though it was very fun making Scotties that can be enjoyed from year to year, I felt we needed some sugar cookie dogs that could be eaten with a nice cup of tea or gifted in a sweet cookie tin. My December 2018 blog features Suzi’s sugar cookie recipe which is tasty and reliable. It is my go-to cookie recipe whenever I want a cut-out cookie. You can always bring up our past blogs by searching our website or click here for Suzi’s recipe: http://www.myteaplanner.com/cakes-and-tea---kathleens-blog/archives/12-2018 There are several good holiday cookie recipes there and many, many more on the website. 
​
Picture
Picture
Picture
 
The Tea Nook, Lincoln,  California
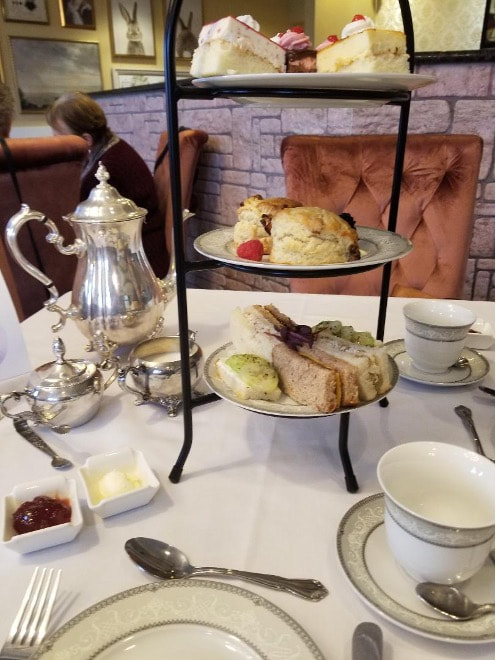
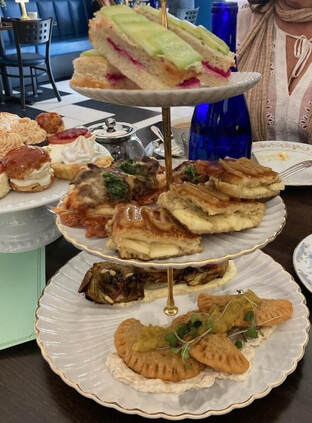
My dear friend, Merlina, moved to Lincoln, near Sacramento and found a sweet little tea shop in the historic downtown. We spent a delightful afternoon in early November, savoring the traditional three tiered serving tray filled with scones, freshly made sandwiches, and petite, seasonal pastries. Velvety pumpkin soup in a little tea cup started off our tea meal, alongside a very fresh and light tomato quiche. The food was excellent and served by our hostess who was perfectly attentive and kept our teapots filled. It was such a lovely afternoon, thank you so much, Merlina! It is worth a special journey to have tea in this little jewel. Do make reservations in advance, as it fills up quickly.
  • Find The Tea Nook on Facebook and Yelp
2 Comments

November 2022 - First Hints of Fall

11/1/2022

2 Comments

 
Picture
                                  A Napa Vineyard wearing fall colors

​As October finally began to cool down, we went ahead with fall plans for our autumn tea party, baked some more pumpkin desserts, indulged in a very special tea excursion, and prepared for National Bundt Day (November 15th.)

Let’s get to it!

Annual Fall Tea Party: Kristin hosted the fall tea party this year in the sunny living room of her French Gulch Victorian. I look forward to getting out the fall decorations, china, and linens each year as much as making the fall tea menu and enjoying the fall flavors we have come to know and love. The My Tea Planner autumn seasonal tea menu is one of my very favorites but I usually can’t resist adding a new recipe or making a twist on an old favorite each year. You’ll find the classic fall tea menu here: Autumn afternoon tea menu, I think it is a wonderful place to begin building your own tea menu. One item always on the menu is Kristin’s fresh pumpkin soup. This year, she substituted chopped butternut squash for the fresh pumpkin which saves lots of prep time and tastes just as heavenly. The easy recipe is here: Butternut sqush or pumpkin soup recipe

While you are scrolling through our website, remember many fundamental tea recipes are available for free download and can be customized to the season, if desired. Anyone interested in hosting their own tea gathering will enjoy having the basics in one place: Free basic tea party recipes from My Tea Planner I used our basic scone recipe to make these currant scones, cut into the maple leaf shapes of different sizes. During fall, you can find leaf-shaped cutters in stores. I use the small leaf cutters to decorate pie crusts or make small cookies to accent desserts and the bigger ones for sugar cookies or seasonal biscuits or scones. Suzi made the delicious apple hand pies, the crust from a favorite blogger’s recipe, here: Zoe's pie crust recipe I also like Zoe’s cake recipes; she is a great resource for interesting cakes. Finally, I highly recommend Libby’s website for pumpkin recipes including their moist pumpkin bread (to which I add fresh cranberries) and my favorite pumpkin roll recipe: Libby's Pumpkin Roll Recipe
​
Autumn Afternoon Tea Party 
French Gulch, California
Menu


​Butternut Squash Soup, Filo Triangles with Caramelized Onions and Beef
Chicken Salad Sandwiches with Dried Cherries, Almonds, and Chives
Leaf-Shaped Currant Scones with Autumn-Spiced Butter
Shortbread Fingers, Apple Hand Pies, Pumpkin Roll
Harvest Chocolate Candies,  PG Tips Black Tea, and Champagne
​

Picture
Picture
Picture
Picture
Suzi’s apple hand pies, shortbread, leaf-shaped scone dough, Harmony and hostess Kristin with the tea table.   

​National Bundt Day, November 15th: As long-time readers know, I’m a sucker for a good bundt cake. Usually moist and unfussy to decorate, bundt cakes can feed a lot of people and most recipes keep well and freeze perfectly. Truly a cake style that fits a multitude of situations.

Picture

I have my time-tested favorite bundt recipes, many of which you can find on our website by using the search function at the bottom of our homepage, but I am always on the lookout for a delicious sounding new recipe to try. In that spirit, I found a recipe for a bundt cake that combines our fall pumpkin with the flan layer from the wildly popular ChocoFlan cake. Using a boxed chocolate cake mix and a few other ingredients, this method magically comes out of the oven with a luscious layer of creamy flan on top of a rich chocolate cake layer. Most chocolate lovers cannot resist it. I do like it but I don’t necessarily need chocolate with my flan. I heartily encourage you to make it though, as it is a big hit with the vast majority of humans. Here is the Betty Crocker version: Easy Chocoflan recipe
​

I was looking for that creamy flan with a more autumnal flavor when Southern Living magazine popped up with their "Pumpkin Spice Cake” recipe which just happeded to be a pumpkin cake with a layer of flan! It sounded so good that I tested the recipe and found that yes, indeed, it is fantastic. You get easy purchased caramel sauce dripping over a layer of flan with a gently spiced pumpkin cake underneath. The recipe is a true keeper. I sent sections of the cake to work with my brother and sister-in-law, Tiffany, and reviews came back with 100% raves. I used the cheapest caramel sauce at the market, Mrs. Richardson’s, and it was great. I’ve used Mexican cajeta sauce, fancy salted caramel sauces, Smucker’s ice cream topping, and all work perfectly fine. This cake really is divine and would make a huge splash on the Thanksgiving dessert buffet. I had some poached pears and apples in the fridge for another project so paired a slice of the flan cake with a few pear slices, more caramel sauce, and a wee little scoop of vanilla ice cream. I added flan to the title of the recipe, so you won’t forget to make this deicious cake: Pumpkin Flan Bundt Cake
​

Picture

DIY Pumpkin Spice Blend: I ran out of pumpkin spice when I was baking at Dad’s house. Luckily, he stocks lots of fresh spices from Penzey’s so I was able to mix my own. I don’t love lots of clove in my mix so I left it out. If you do like a little clove, add one quarter teaspoon to the following mixture. Whatever you do, don’t add too much clove as that will overpower all the other spices.
  • Makes 3 tablespoons
  • 5 teaspoon ground cinnamon
  • 2 teaspoon ground ginger
  • 1 teaspoon nutmeg, freshly gound, if possble
  • 1 teaspoon gound mace
  • Mix all spices together gently so as not to create a spicy cloud that makes you sneeze. Keep in a little jar to use whenever you need pumpkin spice blend.

​A Very Special Afternoon Tea on the Napa Wine Train:
​Where does one begin?

​
Picture
Picture
Picture
Picture
The beautifully decorated interior of the train car, bubbly and beverage menu, desserts, cheese, scones plate, and tea cup with tea menu. 
​

Picture
Picture
Picture
Caviar plate, sandwiches on tiered tray, extremely happy afternoon tea train passengers Tiffany and me. 

​I’ll let them start. From their own website:

“It might seem cliché to say that the Napa Valley Wine Train is more than the sum of its parts, but it is. Part distinctive Napa Valley fine dining restaurant, part museum, part journey to some of California’s most celebrated wineries, the Wine Train is made up of exquisitely and faithfully restored vintage early 20th century Pullman cars.


With its Honduran mahogany paneling, brass accents, etched glass partitions, and plush armchairs, the Wine Train also evokes the elegant glory days of luxury train travel of the early 1900s. You get to sit back, relax, and savor every delicious bite, every bit of extraordinary scenery, every taste and tour. There are lots of ways to explore Napa Valley. This one is an experience you will never forget.
​


It’s tea time on the Wine Train. Experience our newest Napa Valley adventure – Afternoon Tea service. Enjoy a 3-hour journey filled with all the delights of a traditional tea service but with our own wine country twist. Savor fine sips, delectable bites and glorious vineyard views on this elegant experience.”
Picture
Picture
Now my turn to gush about the afternoon tea service on the Napa Wine Train. They are correct, the train cars are very comfortable and beautifully appointed. Upolstered swivel seats are lined up on both sides of the car, in front of a wide ledge where a glass of sparkling wine and vintage tea cup await you. There are a few tables for parties of two or four scattered through the car. Soon after the train starts moving, tea is served from a wheeled cart by one hostess while a second hostess begins commentary on the passing scenery and points of interest, including some of the best vineyards in the world. A very animated group of six French tourists provided a cosmopolitan backdrop, helping transport us far from everyday life. 

Once outside of the city of Napa, the scenery becomes lush with oak trees and wineries of every description.Victorian farmhouses nestle between stone wineries, outdoor dining areas attached to storied restaurants, and quaint boutiques. The hostess points out the world-famous French Laundry restaurant as we pass through Yountville. We see the Oakville Grocery store that I remember from the 1970s, now with a big patio so people can enjoy the gourmet foods and wines they have aquired. The train passes through Rutherford, stopping to let off a group who will spend an hour tasting at Grgich Hills winery, on the west side of the train. At Saint Helena, we idle at Charles Krug winery before the locomotive is detatched from the now back of the train then led on a parallel track, past the train cars, to be reattached at the end of the train, which is now the front. We were confused, too, but we did start the slow journey back to Napa.

During all this viewing of beautiful scenery, courses of afternoon tea have been served at a gentle pace, removed, and replaced with another artfully plated course. A small bowl of tomato bisque is replaced with a leafy green salad, hiding chunks of golden and scarlet beets. A very generous three tiered tray of sandwiches follows, each one very fresh, creatively assembled, and visually pleasing. Lobster in a creamy sauce poked out of the tiniest vol-au-vent I’d ever seen. Tiffany has spoiled us by ordering each our own caviar service. If you like caviar, this is the most lavish treat imaginable. I do like caviar and it was indeed fabulous and decadent and totally satisfying. Who knew potato chips were the perfect foil for caviar?
​
Everyone in our car was having a wonderful afternoon. A handsome bartender brought bottles of bubbly in silver ice buckets and balloon wine glasses of local wine. We had more hot tea each time the hostess went by. The French group became more animated and it was such a lovely way to spend the day. The sweets tray arrived with perfect madeleines, lemon tarts, tiny fruited scones with blueberry preserves, macrons, exquisite tiny chocolates, with blush table grapes and Comté cheese. A little jewel box of a dessert course, an afternoon to be remembered. More information here: Napa Valley Wine Train
2 Comments

October Blog - Pumpkin Time

10/1/2022

1 Comment

 
Picture

​Sister fall lovers will understand: life can begin again after the purgatory of summer temperatures in far Northern California. The best choice is to hide in the house. The first early morning when cool air creeps over the doorstep is the first moment you can start to entertain the idea that autumn will actually arrive, that the days of over 100˚ will eventually end, days when turning on the oven will not feel like an act of self-torture. Oh, the promise of chilliness! It takes awhile to get to actual cool days. I have to hold on to the hope that “summer” will finally be over in October. 
​


With the delusion of summer ending in September, we scheduled camping near Napa. Um, not the best idea I’ve ever had. We arrived to set up camp in record 115˚ temperature. While everyone kept their cheerful face plastered on, we all agreed that it was the hottest we’d ever been in our lives. On the brighter side, I left the rainfly off the tent so we had the full moon shining down on us through gorgeous oak branches. Here’s the still dreamy daytime view, below:
​
Picture
Day two, we wised up and ran away to the coast, through the redwood forest, along the Russian river. We found our cool weather near Jenner, at Goat Rock Beach. A driftwood beach hut provided shade and another lovely sky view.
​

Picture

While near Sonoma, I’d planned on taking the campers wine tasting at Gloria Ferrer Winery. I’d first tried their sparkling wines at the Carneros winery many years before. Not only is the wine reliably delicious, it is usually a good value. Best for our current needs, the winery has a tour of the wine caves which keep several degrees cooler all year round. 
​
Picture

In the end, we skipped out of the Napa Valley heat zone and headed straight to the Bay Area for the cooler part of the vacation. To cheer myself up later, I found a bottle of Gloria Ferrer Sonoma Brut at Costco. Champagne is a wonderful accompaniment to rich desserts, so I paired it with the pumpkin pot de crème that I made for this pumpkin blog. Full disclosure, there’s not much I think doesn’t pair well with champagne.

I bought most of the ingredients for my pumpkin baking at Trader Joe’s, mainly because they have my favorite canned pumpkin, their store-brand organic pumpkin puree. It has a deep, fresh pumpkiny flavor. I also wanted to pick up the maple leaf-shaped sandwich cookies to accompany the pot de crèmes. I bought sugar pumpkins and the weirdest green speckled gourd for décor, too. The sugar pumpkins will eventually be turned into fresh pumpkin soup, thanks to Kristin’s now legendary recipe and willingness to break down a pumpkin each fall.
​


Picture
Pumpkin Cup Custard or Pot de Crème

Old-fashioned cup custard is an egg custard baked gently in little cups, in a water bath. I grew up with the familiar clear Pyrex set in which we often made baked custard, flavored simply with vanilla or with pumpkin puree in fall. We all loved the pumpkin version because you could pretend you were eating pumpkin pie without the crust. As you probably know, pumpkin pie is a custard pie with spices and pumpkin or squash stirred in. Same deal with southern sweet potato pie.

Pot de crème is simply a richer custard with a French name. If you’re feeling indulgent and devil-may-care, use more butter, cream, and the extra 2 egg yolks while luxuriating in the satin-smooth texture of this tiny portion of heaven. If you’re feeling rather New Englandish and wholesome, use all or mostly milk rather than cream, the modest 2 tablespoons of butter, and the Spartan 6 egg yolks. Remind yourself of the health benefits of pumpkin, including high levels of vitamins A and C and potassium. Be sure to feel smug when serving to guests or yourself.

Some cooks serve pot de crème in little white ramikins which are available in many sizes. The 6 ounce size works well here but you could serve very rich custards in 4 ounce or generous servings in an 8 ounce version. I am very fond of the brown earthenware custard cups we scored years ago, in a thrift shop. For our fall tea party, I look forward to getting them out and serving pumpkin soup, custard, or miniature trifles in these little gems. 

Makes 8-5 ½ ounce servings

Preheat oven to 325˚F

Special equipment: large tea kettle or other pot for boiling water, heavy-bottomed, medium-sized saucepan, wooden spoon, whisk, mixing bowl, fine mesh strainer, 8 cup batter bowl or other spouted container, custard cups or ramekins set on a rack in a large roasting pan, silicone spatula, foil, cooling rack
  • 2-4 tablespoons butter
  • ​½ cup packed brown sugar
  • 3 cups cream or whole milk, warmed up for a minute or two in the microwave, do not let boil
  • ½ teaspoon vanilla
  • 6 or 8 egg yolks, beaten
  • 1 1/3 cup pumpkin puree, canned is fine
  • ¼ teaspoon salt
  • ​1 teaspoon pumpkin pie spice or a blend of your favorite warm spices (equaling 1     teaspoon) such as cinnamon, mace, nutmeg, ginger, cardamom

Optional garnish: Maple sandwich cookies
​
  1. Boil a large kettle of water for the water bath. Stir together butter and brown sugar in saucepan over medium heat until sugar is melted. The mixture may look lumpy but with constant stirring will come together. Continue to stir until mixture begins to brown, taking off heat momentarily if mixture starts to get too dark.

  2. Add warm cream or milk, whisking constantly, one cup at a time, until sugar dissolves again. Repeat until all cream has been added. Stir in vanilla and salt. Remove from heat.

  3. Place beaten egg yolks in mixing bowl. Slowly whisk in about a cup of the hot cream mixture to temper the egg yolks. Pour the yolk mixture carefully back into the saucepan, whisking to combine. Pour mixture through mesh strainer into 8 cup batter bowl. Stir in pumpkin and pumpkin pie spice.

  4. In prepared roasting pan with custard cups, carefully divide mixture equally into cups. Set pan on oven rack and carefully pour in boiling water, halfway up the outsides of the cups. Tent with foil.

  5. Bake for 25 to 40 minutes, until custards are just set. They should jiggle like set gelatin when gently shaken. Be sure not to over bake as that will make the texture turn from silky to grainy.

  6. Set roasting pan on cooling rack and let cups cool in water bath. When cooled to room temperature, remove from water bath and chill for at least an hour before serving. The custards can be made a few days ahead. Serve with maple sandwich cookies, if desired.
Picture
Pumpkin Babka
I love the showy swirls of a rich, yeast-raised babka. Throw autumn-hued pumpkin in the batter and you get fall magic. It’s like a sticky bun collided with a brioche and smashed into a pumpkin loaf. All tasters gave it rave reviews. This is an enriched dough, lots of butter and eggs, so rise times can be double those of a leaner loaf. 

Makes 1 loaf
Preheat oven to 350˚F after second rise, at the end of step #3

Special equipment: stand mixer with dough hook, plastic wrap, medium bowl, wooden spoon, 9” by 5” loaf pan, lined with parchment paper and greased, offset spatula or butter knife, sharp knife, small bowl, small whisk or fork, pastry brush, foil, cooling rack

Dough:
  • 2 ¼ cups flour
  • 2 tablespoons sugar
  • ¼ teaspoon salt 
  • 1 teaspoon instant yeast*
  • ½ cup pumpkin puree, canned is fine
  • 1 egg
  • 3 tablespoons milk
  • ¼ cup (1/2 stick) butter, cut into cubes and softened
  • ​1-2 teaspoons vegetable oil, for greasing bowl

Filling:
  • ¼ cup softened butter
  • 1/3 cup packed brown sugar
  • 1 tablespoon flour
  • 2 teaspoons cinnamon
  • ½ cup chopped pecans
  • 2 tablespoons pumpkin seeds, optional

Egg wash:
  • 1 egg yolk
  • 1 teaspoon water

  1. Make the dough: In mixer bowl, add 2 cups of flour,  2 tablespoons sugar, salt, and yeast. Attach dough hook and and mix at low speed for a few seconds. Add pumpkin, egg, and milk and mix for 3 to 4 minutes, until combined. Beat in one cube of butter at a time until completely incorporated. The dough should come off the sides of the bowl and will be sticky. Mix in the remaining ¼ cup of flour until a ball forms. Remove the dough hook and pat and shape the dough into a ball. Pour the oil over the ball and spread it around with your fingers. Cover the bowl with plastic wrap and put in a warm corner of the kitchen to rise. The dough should double in bulk in 2 to 3 hours. 
  2. Make the filling: In medium bowl, stir together ¼ cup softened butter, brown sugar, 1 tablespoon flour, and cinnamon. Stir until the mixture forms a smooth paste. Set aside. Pecans and optional pumpkin seeds will be added in next step.
  3. Assemble babka: On clean work surface, shape dough into a rectangle approximately 9” by 18.” Spread the filling on the dough, up to an inch of the edges. Sprinkle with pecans and optional pumpkin seeds. Starting with the short end, roll the dough into a log, sealing the seam and ends. With sharp knife, cut the log in half lengthwise. With cut side up, gently twist the two halves together, tucking ends underneath. Transfer to prepared loaf pan. Cover lightly with plastic wrap or a clean kitchen towel and let rise until almost doubled in bulk, 1 ½ to 2 ½ hours. Preheat oven.
  4. Prepare egg wash by whisking egg yolk and 1 teaspoon water in small bowl. Using pastry brush, brush egg wash on top of loaf. Bake in preheated oven for 40 to 50 minutes. During the last 15 minutes, if the top is getting too brown, tent with foil. Remove from oven and immediately run a knife around edges of pan. Let cool in pan for 10 minutes then turn out onto rack to cool complelely. The babka cuts best when totally cool. Best eaten the day it is made but will keep at room temperature for a few days, if well wrapped. Makes excellent toast and extravagant French toast. It also freezes well.

    *I used regular yeast because I had it on hand. If using instant yeast as the recipe calls for, the rise times might be less. ​
Picture
Picture
​Top, the dough for the pumpkin babka, all set for its second rise.
Bottom, steps of a previous babka, showing the rolling, cutting, and twisting technique.
 
1 Comment

August 2022 - Closed for the Season

8/1/2022

0 Comments

 
Picture
​The oven is off, the kitchen is closed, just for the summer. There is one wedding cake due in late August but otherwise, I’m out of the kitchen. “Cakes and Tea” is going on break as well. Fall is the baking New Year and I’m planning a very pumpkiny October blog. Have a lovely summer and I’ll be back when the mornings are cool once more. 
0 Comments
<<Previous

    Author

    Some random thoughts from Kathleen...

    Archives

    June 2023
    May 2023
    April 2023
    March 2023
    February 2023
    January 2023
    December 2022
    November 2022
    October 2022
    August 2022
    July 2022
    June 2022
    May 2022
    April 2022
    March 2022
    February 2022
    January 2022
    November 2021
    October 2021
    September 2021
    August 2021
    July 2021
    June 2021
    May 2021
    April 2021
    March 2021
    February 2021
    January 2021
    December 2020
    November 2020
    October 2020
    May 2020
    April 2020
    March 2020
    February 2020
    January 2020
    December 2019
    November 2019
    October 2019
    September 2019
    August 2019
    July 2019
    June 2019
    May 2019
    April 2019
    March 2019
    February 2019
    January 2019
    December 2018
    November 2018
    October 2018
    September 2018
    June 2018
    May 2018
    April 2018
    March 2018
    February 2018
    January 2018
    December 2017
    November 2017
    October 2017
    September 2017
    August 2017
    July 2017
    June 2017
    May 2017
    April 2017
    March 2017
    February 2017
    January 2017
    December 2016
    November 2016
    October 2016
    September 2016
    August 2016
    July 2016
    June 2016

    Categories

    All

    RSS Feed

    Contact Us
home
free recipes
purchase recipes
Address : 51-349 Kamehameha Highway, Kaaawa, HI 96730

Telephone :  408-379-5200


Copyright © 2015 by Epilogics
  • Home
  • About/Blog
    • Who We Are
    • Our Credentials
    • Tea Travels - Rose's Blog
    • Cakes and Tea - Kathleen's Blog
    • Contact Us
  • The Tea Book
    • The Road Back to Civilization
    • A Brief History of Tea
    • Philosophy of Tea >
      • Harmony
      • Humility
      • Respect
      • Creativity
    • Guidelines for the Host/Hostess >
      • Gathering and Greeting
      • Sharing Stories
      • Sharing Food
      • Sending the Guests Home
    • Guidelines for the Guest >
      • Respect Your Hostess/Host
      • Bring a Gift if You Wish
      • Practice Humility
      • Monitor Your Conversation
      • Arrive with a Grateful Attitude
      • Help if Help is Needed
      • Do Not Criticize
      • Leave Gracefully
      • Send a Thank You Note
    • A Checklist for Planning a Tea Party
    • Teas of the World and How to Make Tea >
      • A Sampling of Teas
      • Herbal Teas and Tisanes
      • How to Make Tea
      • Making Iced Tea
      • Tea Concentrate
      • Brewing Tea for a Crowd
    • Tea Utensils and Accessories >
      • Tea Kettle
      • Tea Pot
      • Tea Cozy
      • Teacups
      • Plates
      • Silverware
      • Teacart
      • Tea Strainer
      • Tea Infuser
      • Three-Tiered Server
      • Cream Pitcher and Sugar Bowl
      • Cake Pedestal
      • Trifle Bowl
      • Jam Pots
      • Serving Dishes, Platters, and Trays
      • Silver Tea Set or Silver Tray
      • Linens
      • Kitchen Equipment for Food Preparation
    • Tea Menu Basics >
      • Sandwiches and Savories
      • Savory Spreads and Dips
      • Scones and Tea Breads >
        • About Lemons
    • Afternoon Tea and the Four Seasons >
      • A Spring Tea
      • An Outdoor Summer Tea
      • An Autumn Afternoon Tea
      • A Winter Afternoon Tea
    • A Calendar of Tea Parties >
      • January: A Japanese New Year’s Tea
      • February: A Valentine’s Day Tea
      • March: A St. Patrick’s Day Irish Tea
      • April: An Easter Tea
      • May: A Mother’s Day Tea
      • June: A Wedding Reception Tea >
        • Lemon Yogurt Wedding Cake
      • July: A Picnic Tea
      • August: A Family Reunion Tea >
        • A North American Family Reunion Tea
        • An Eastern Mediterranean Family Reunion Tea
        • A Kosher Family Reunion Tea
        • A Scandinavian Family Reunion Tea
      • September: An Ozark Farm Harvest Tea
      • October: A Tea to Honor Our Ancestors (Dia de los Muertos)
      • November: A Post Thanksgiving Tea
      • December: A Christmas Tea >
        • In Defense of Fruitcake: Fruitcakes and Candied Fruit
    • A World of Tea Parties >
      • A Chinese Dim Sum Tea
      • A Portuguese Tea
      • A Classic British Afternoon Tea
      • An Indian Chai Party
      • A California Tea
      • A Hawaiian Tea
      • An Italian Tea
      • An American Southern Tea
      • A Russian Tea
      • A French Afternoon Tea
      • A Kosher Tea with Tradional Jewish Foods
    • Afternoon Tea for Special Occasions >
      • An Afternoon Tea for Children
      • A Tea for Our Elders
      • A Honey Bee Tea in the Garden
      • An Urban Tea on the Go
      • Tea for One
      • Afternoon Tea for a Large Group
      • A Vegan Tea
      • A Rose Tea
  • Purchase Recipes
  • Resources
    • Bibliography and Resources
    • Menu and Recipe Index
    • Commercial Food Products
    • Glossary