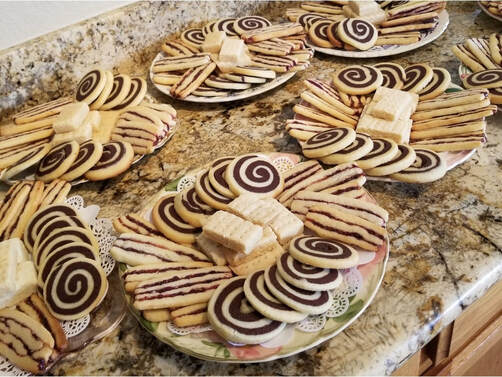
Cookie plates filled with a favorite selection of cookies for afternoon tea: chocolate pinwheels, classic Scottish shortbread, and layered jam ice box cookies
I loved Rose’s two-part chocolate blog so much, I wanted to jump on the chocolate bandwagon and add a few favorite chocolate cookie recipes. She is correct when she says chocolate is appreciated in all seasons and is sorely missed when absent. A chocolate cookie or brownie is a little piece of heaven in your hand.
At the inns, I made large quantities of brownies weekly but for the past 17 years, I’ve had a non-brownie fan in my house. I know: I didn’t know such a human existed. It’s perplexing. I’m a little rusty on my brownie game which is a grand excuse to test a few of my old favorite brownie recipes. Back in the 1990’s, Gourmet magazine, had a lovely article devoted entirely to brownies. I made all the varieties, such as cream cheese-swirled brownies, chocolate cherry brownies, espresso and coffee bean brownies. They were all really tasty and all had fans among the guests, but my favorite is always the fudgy, plain chocolate ones with the shiny chocolate frosting.
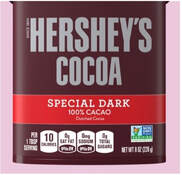
Brownies call for the best chocolate or cocoa you can find. Recipes using cocoa or melted chocolate can both be dark and delicious, as long as you chose high quality products, as Rose explains in her chocolatey blogs. When making cocoa brownies, I favor Hershey’s Special Dark Cocoa which is a bit darker and richer than their traditional cocoa. I use the Pound Plus bar from Trader Joe’s which is a good Belgian chocolate at a price that can’t be beat.
 |  |
Robert’s Favorite Fudgy Brownies
Scharffen Berger fine chocolate company’s chocolatier, Robert Steinberg, adapted this Maida Heatter recipe to use 70% bittersweet chocolate but you can use any good chocolate you like.
- 8 ounces bittersweet or other good quality chocolate, chopped
- 6 tablespoons butter
- ¼ teaspoon salt
- ½ teaspoon vanilla
- 1 cup sugar
- 2 eggs
- 1/3 cup flour
- ½ to 1 cup chopped walnuts, optional
- Adjust a rack 1/3 up from the bottom of oven and preheat to 325 degrees F. Butter or line with parchment paper an 8” square pan and set aside. Melt chopped chocolate and butter in a double boiler or in the microwave, just until melted, stirring frequently.
- When melted and smooth, stir in salt, vanilla, and sugar. Beat in eggs, one at a time, stirring after each addition until incorporated.
- Add the flour and beat vigorously until it becomes shiny and pulls away from the sides of the bowl. (This may take several minutes, depending on how strong you are.) Stir in nuts, if using. Turn mixture into prepared pan and smooth top.
- Bake for 30 to 40 minutes or until a toothpick inserted gently into the center comes out moist but free of batter. *
- Remove from oven, cool on rack. Serve warm or at room temperature.
Makes 16 2-inch brownies
- *It is always better to undercook brownies than to overcook them. Watch the baking time closely for best results.
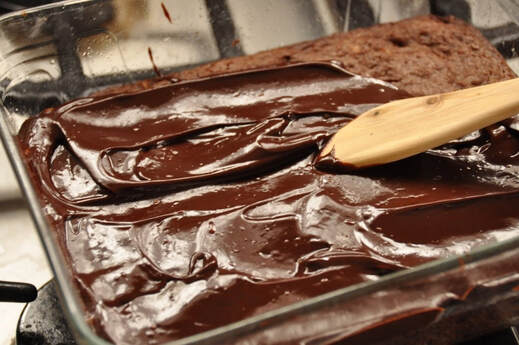
I liked how the frosting photographed on this recipe from Barbara at Feast Everyday. Isn’t it nice and shiny? She gives the recipe here: Martha's Iced Brownies
Best Cocoa Brownies
This Epicurious recipe from November, 2003, is from legendary baker, Alice Medrich. She notes that “Cocoa brownies have the softest center and chewiest candy-like top crust of all because all of the fat in the recipe (except for a small amount of cocoa butter in the cocoa) is butter, and all of the sugar is granulated sugar rather than finely milled sugar used in chocolate.” Use the best cocoa you know in these brownies. Personally, I don’t care for the crackly top which led me to turn my pan of cooled brownies upside down, smooshing that crackle top, and then frosting the smooth bottom which is now the top.
Yield: Makes 16 large or 25 smaller brownies
Yield: Makes 16 large or 25 smaller brownies
- 10 tablespoons butter
- 1 ¼ cups sugar
- ¾ cup cocoa
- ¼ teaspoon salt
- ½ teaspoon vanilla
- 2 cold eggs
- ½ cup flour
- 2/3 walnut or pecan pieces, optional
- Special equipment: 8-inch square pan
- Position rack in lower third of oven and preheat to 325 degrees F. Line the bottom and sides of the baking pan with parchment paper or foil, leaving an overhang on two opposite sides.
- Combine the butter, sugar, cocoa, and salt in a medium heatproof bowl and microwave until melted, or set bowl in a wide skillet of barely simmering water. Stir from time to time until the butter is melted and the mixture is smooth and warm enough that you want to remove your finger fairly quickly after dipping it in to test. Remove the bowl from the skillet and set aside briefly until the mixture is only warm, not hot.
- Stir in the vanilla with a wooden spoon. Add the eggs one at a time, stirring vigorously after each. When the batter looks thick, shiny, and well blended, add the flour and stir until you cannot see it any longer; then beat vigorously for 40 strokes with the wooden spoon or a rubber spatula. Stir in the nuts, if using. Spread evenly in the prepared pan.
- Bake until a toothpick plunged into the center emerges slightly moist with batter 20 to 25 minutes. Let cool completely on rack. Lift up the edges of parchment or foil and transfer to a cutting board. Remove and discard parchment or foil. Cut into 16 or 25 squares.
Here are a few of my brownie tips:
Uncut slabs of brownies freeze very well if completely cooled, chilled until firm, then wrapped airtight in plastic wrap and put into a zip-top freezer bag. To serve, unwrap brownie slab and let come to room temperature then cut into squares or frost entire slab before cutting.
I’ve successfully doubled both these recipes and baked them in 13” by 9” pans. The baking time is a little bit trickier, but as mentioned above, better to under bake them than risk drying them out.
My usual shine chocolate brownie glaze is 6 ounces good quality chopped chocolate melted with 4 ounces (1 stick) of butter. I usually melt my butter-chocolate mixture in a 2-cup glass measuring cup, in the microwave, stirring every 30 seconds, just until melted. Pour chocolate mixture over brownie slab, gently smoothing with an offset spatula or the back of a table knife. When frosting has set up, cut into squares. You can chill briefly in the fridge to hasten setting up, but the topping may lose its shine if chilled for too long.
Leaving the velvety dense chocolate of brownies for a minute, I have a special place in my heart for deep chocolate wafer cookies and chocolate and vanilla ice box cookies. I make these often as rolled-out sheets of dough, or rolled-up logs of dough can be chilled in the fridge for a few days or frozen for longer storage. Baked cookies also freeze beautifully, if well wrapped and stored in zip-top bags or my preferred method, cookie tins.
Chocolate pinwheel cookies are eye catching on a cookie tray and have the perfect sugar-cookie-meets-chocolate-wafer-balance. I used to carefully stack the chocolate and vanilla doughs to make checkerboard cookies but it is just so much easier to roll the two doughs together in a tight spiral and cut off slices. Save the mingled dark and light doughs to reroll at the end and make into randomly swirled cut out cookies. For all-chocolate wafers, roll the chocolate dough thin and cut out with a round or scalloped cookie cutter.
Suzi’s Chocolate Sugar Cookie Dough for Wafers and More
- 3 cups flour
- ½ cup cocoa
- ½ teaspoon baking soda
- ¼ teaspoon salt
- 1 cup butter, softened
- 2/3 cup sugar
- ½ cup brown sugar, packed
- 1 egg
- 2 tablespoons coffee-flavored liqueur, such as Kahlua or strong coffee
- 1 teaspoon vanilla
- Coarse sugar, optional
- Sift flour, cocoa, baking soda, and salt, making sure mixture has no lumps. Set aside. In mixer bowl, beat butter and sugar until incorporated, scraping bowl as needed. Beat in egg. Stir in Kahlua and vanilla.
- Stir in flour mixture until no flour shows. Wrap dough in plastic wrap and chill about 20 minutes. Line baking sheets with Silpat mat or parchment. Preheat the oven to 350 degrees F, when ready to continue.
- For wafers, roll out dough to 1/8” to ¼” thick. Cut with scalloped round cutter or other approximately 2” diameter round or square cookie cutter. Place about 1” apart on prepared baking sheets. Prick with fork a few times and sprinkle with coarse sugar, of desired. Lightly press sugar into cookie tops. Bake for 9-12 minutes. Cool completely on racks.
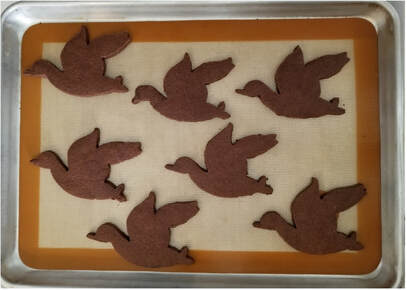
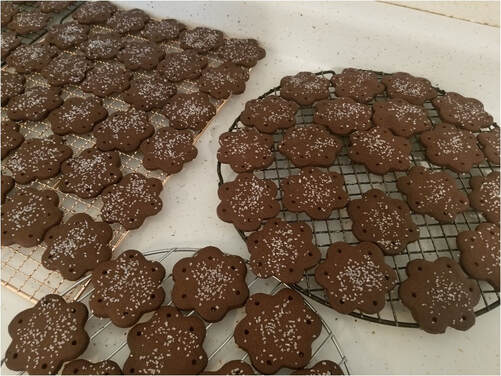
Above, a flock of chocolate geese fly south for the winter.
Pinwheel Cookies
One recipe of Suzi’s chocolate sugar cookie dough
Vanilla dough:
Vanilla dough:
- 2 ½ cups flour
- ½ teaspoon baking powder
- ½ teaspoon salt
- 1 cup butter, softened
- 1 cup sugar
- 1 egg
- ½ teaspoon vanilla
- Stir together flour, baking powder, and salt. Set aside. In mixer bowl, beat butter and sugar until incorporated, scraping bowl as needed. Beat in egg and vanilla. Stir in flour mixture until no flour shows. Wrap dough in plastic wrap and chill about 20 minutes.
- To make chocolate and vanilla pinwheels: Have chocolate doughs and vanilla doughs prepared and chilled. Working with one half of the chocolate dough, roll out dough between two sheets of parchment, to a thickness of slightly more than 1/8.” Slide dough and parchment “sandwich” onto a tray and return to refrigerator. Repeat with vanilla dough.
- Peel off top parchment sheet from vanilla dough and chocolate dough. Carefully lay the vanilla on the chocolate. Gently pat or roll the two doughs so they adhere together. Trim into a rectangle. Remove the top sheet of parchment. Starting from the long side closest to you, grasp the bottom parchment sheet to help you tightly roll into a pinwheel log, removing the parchment, as you roll.
- Gently roll the log back and forth to make the log more even. Wrap in plastic wrap and chill while you repeat with the other chocolate and vanilla dough. Chill the wrapped logs up to three days or freeze up to a month (in a zip-top freezer bag.)
- Preheat the oven to 350 degrees F, when ready to continue. Line baking sheets with Silpat mat or parchment. Working with one log at a time, with sharp knife, slice a bit thicker than ¼.” Lay slices about 1 ½” apart on prepared baking sheets. Turn the log every few slices to keep more or less round. Bake in preheated oven for 10 to 12 minutes. Cool or rack completely.
 RSS Feed