 |  |
Love & Chocolate
Chocolate. Love. Chocolate. Love. Chocolate. Love. Chocolate. Love. Chocolate.
Christmas really does slide right into St. Valentine’s Day for me. The big holiday season that starts with Thanksgiving turns to early birthday season then January which turns into late birthday season which goes until Valentine’s Day, whew! I try to have a month or so in which I work on my yearly V-Day art projects, create some new work, frame some old work, and play with some new chocolate desserts.
Chocolate lends itself to celebrations of love. Chocolate melts at body temperature which makes it extremely pleasant to eat, and dark chocolate releases chemicals in the brain that makes you feel happy, even mimicking the feeling of falling in love. A box of high-quality dark chocolates is one traditional gift that is science-approved as well as delicious.
As a baker, I’m drawn to miniature chocolate desserts, heart-shaped cookies, and creamy mousses. I’m not usually a candy maker; I leave that to Suzi and our good friends at See’s Candies. But after Christmas, I was left with a huge jar of maraschino cherries and lots of white chocolate. That lead me to make white chocolate fudge. Since I am not a big fan of maraschino cherries, I made two batches, one with dried cherries and toasted pecans for home and one batch with toasted almonds and chopped maraschino cherries to send to Rose, in Hawaii. The dried cherry batch was yummy and cut perfectly to package in little gift boxes. However, the batch with the maraschino cherries oozed cherry goo when it was cut. I surmised that by the time it arrived in Hawaii, it would have become a sticky mess. It did taste delicious, though, and it seemed a shame to waste it.
I mused on it for a few days, the sticky fudge well-wrapped in plastic wrap in the refrigerator. Though I had drained the maraschino cherries overnight in a sieve and patted them with paper towels, I probably did not dry them enough. If doing it again, I would cut the cherries in half and lay them out on paper towels, cut side down and pat dry with more paper towels.
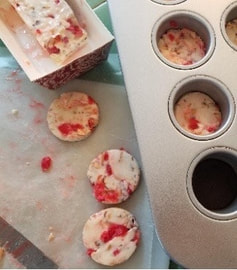 |  |  |
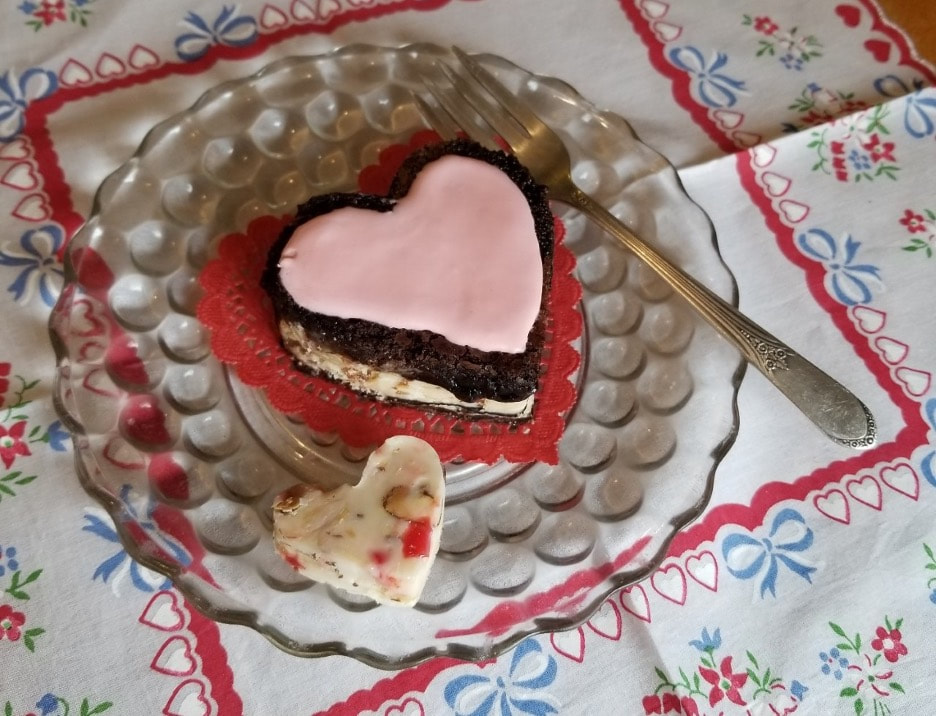
My next thought was that baking the fudge into a batter could also solve the stickiness problem. It was so pretty to look at, it seemed a shame to hide it inside a cupcake or other solid batter. I hit on the idea of making it the center layer of a multi-layered dessert: dark chocolate cookie-like bottom, a thick center layer of the fudge, and a brownie top.
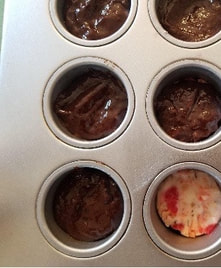
Since I wasn’t thinking ahead to Valentine’s Day heart shapes yet, I figured making them in the 2” removable bottom cheesecake pans would be just the right size and easier to get out of the pan, if the fudge layer stuck to the sides.
I rolled out the chocolate crust and cut it with a 2” round cutter and fit it into the bottom of the wells. Next, I cut out the fudge with the same cutter and put one round on top of each crust, pressing down gently to make sure there were no air pockets. Finally, I made a half batch of brownie batter and spooned about 2 tablespoons over the fudge, smoothing the tops. Though I sprayed the pan with baking spray, they were difficult to remove. Making them in a pan and cutting afterward would be a much better way to go. A little bit of pink glaze finished them off nicely.
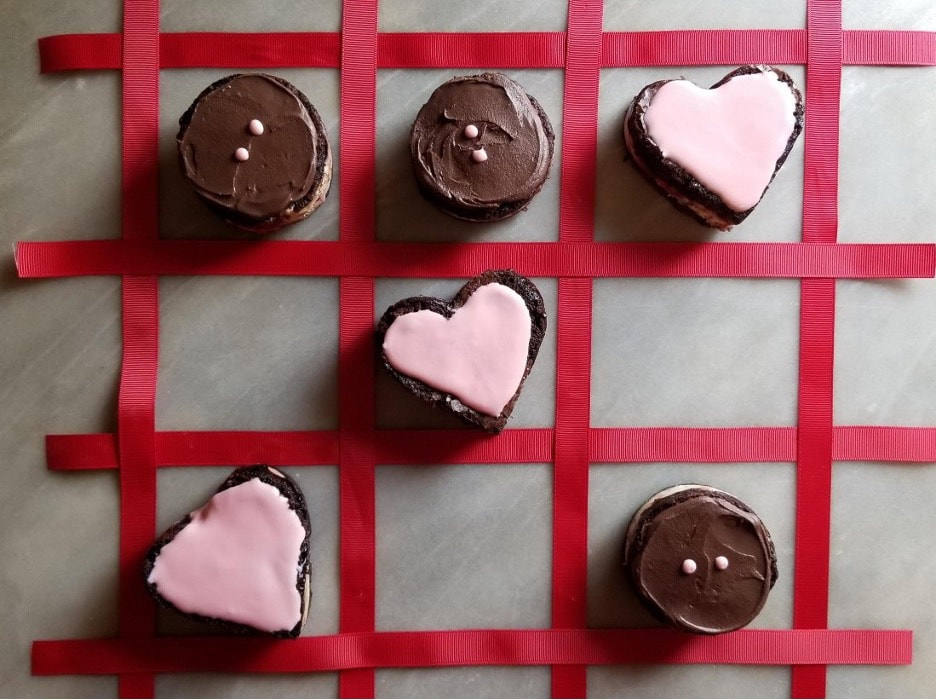
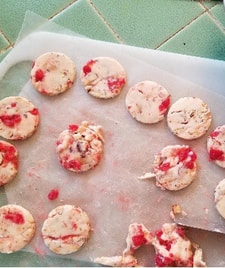
In later versions, I baked the crust-fudge-brownie desserts in an 8” by 8” square pan, cutting them after they were well chilled. This made a nice, clean cut. My friend Polly saw the first batch with the pink glaze and christened them Fudge Buttons, so I added two dots to the above version. The hearts won the tic-tac-toe game above, but they all taste good.
I have written all the recipes you need to make these decadent desserts as well as a suggested timetable plan to make them in manageable steps. Separately, the three recipes are good to have on hand when you want to make a simple batch of white chocolate fudge, a small batch of brownies, or have a reliable chocolate crust recipe. Either way, I hope you can get some chocolate into your St. Valentine’s Day this year and every year. As my grade school teachers taught us, make sure to give a valentine to everyone, so no one feels left out. Still pretty good advice, but if you’re not up to that, a little chocolate for everyone is a great substitute.
I have written all the recipes you need to make these decadent desserts as well as a suggested timetable plan to make them in manageable steps. Separately, the three recipes are good to have on hand when you want to make a simple batch of white chocolate fudge, a small batch of brownies, or have a reliable chocolate crust recipe. Either way, I hope you can get some chocolate into your St. Valentine’s Day this year and every year. As my grade school teachers taught us, make sure to give a valentine to everyone, so no one feels left out. Still pretty good advice, but if you’re not up to that, a little chocolate for everyone is a great substitute.
Happy Valentine’s Day All!
Happy Valentine’s Day All!
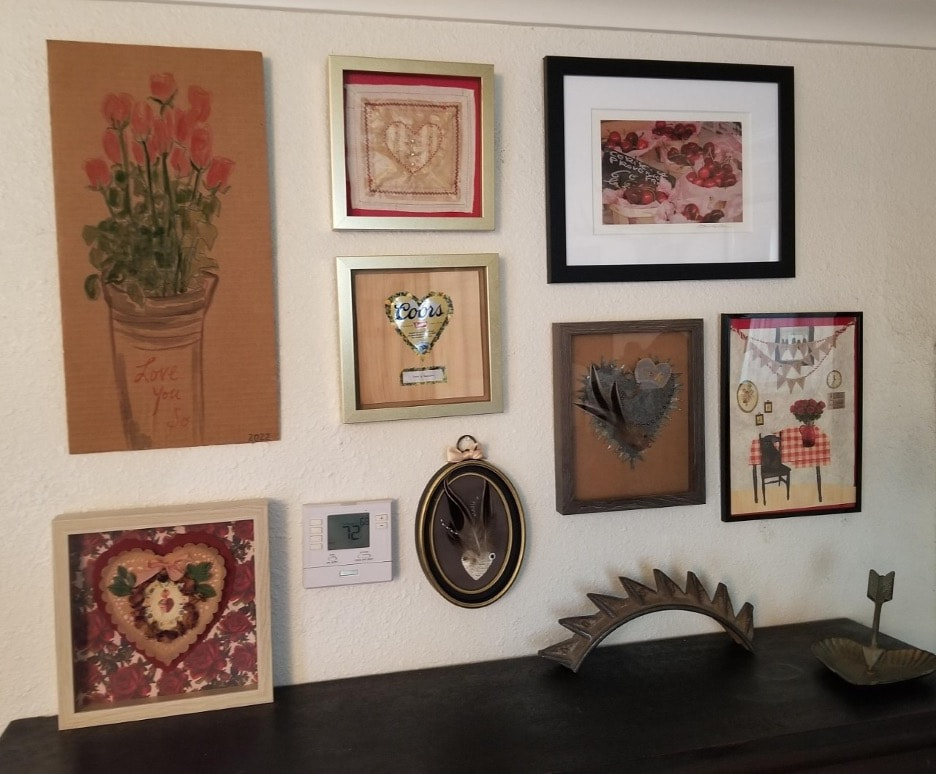
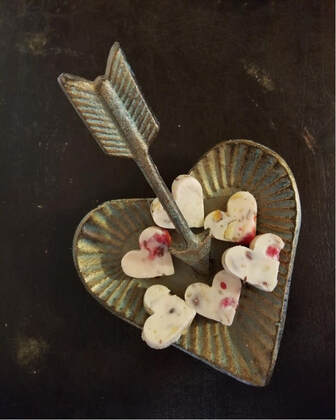
2023 St. Valentine’s Day display featuring my favorite cherry photograph, by Paul Burkholder. Other valentine collages and painting by me. Peggy Sue gifted me with the cool arrow dish. The found metal cog arch is a gift from Mr. Vazquez, who knows how much I love weird metal stuff. And I don’t want to brag, but check out my new thermostat!
Simple White Chocolate Fudge
Makes 8” by 8” pan
Special equipment: microwave-safe mixing bowl, silicone spatula, 8” by 8” pan, lined with parchment or foil, cutting board, sharp chef’s knife or small circle and/or heart-shaped cutters
Special equipment: microwave-safe mixing bowl, silicone spatula, 8” by 8” pan, lined with parchment or foil, cutting board, sharp chef’s knife or small circle and/or heart-shaped cutters
- 3 cups white chocolate chips or 18 ounces chopped white chocolate or white candy melts
- 1 can (14 ounces) sweetened, condensed milk
- 2 tablespoons butter
- ¼ teaspoon almond extract, if desired
- 1 to 2 cups chopped, toasted nuts
- 1 cup dried cherries, roughly chopped if large
- or 1 cup maraschino cherries, halved, drained, and patted very dry
- In microwave-safe bowl, combine white chocolate, condensed milk, and butter. Microwave for 1 minute and stir. Continue to microwave at 30 second intervals, stirring each time, until mixture is melted and smooth.
- Stir in optional almond extract. Fold in nuts and cherries.
- Turn into prepared pan, smoothing top. Chill until cool, about 3 hours.
- Turn out of pan and remove parchment paper. With chef’s knife, cut into 1” squares or use cookie cutters to cut into heart shapes and/or circles.
- Store at room temperature, tightly wrapped, for up to a week or chilled for up to a month.
Chocolate Pie Crust
This a very versatile recipe to have in your recipe box. It is very chocolatey and is easy to handle. It can be used as the crust for cream pies or cheesecakes or as a base for cookie bars. Any leftover dough can be rolled out and baked as chocolate wafer cookies.
Makes 9” pie crust
Special equipment: mixing bowl and pastry blender or food processor and scraper, plastic wrap or waxed paper, rolling pin, pie pan, small knife, fork
Preheat oven to 400 degrees F, in step #3
- 1 cup flour
- 1/3 cup cocoa
- ¼ cup sugar
- ½ cup (1 stick) butter, cut into large pieces and chilled
- 1 teaspoon vanilla
- 2 tablespoons cold water
- In mixer bowl or food processor, combine flour, cocoa, and sugar until mixed. Cut in butter until mixture is in pea-sized chunks. Add vanilla and cold water and mix until a rough dough is formed.
- On sheet of plastic wrap, pat dough into a circle. Wrap and chill for 20 minutes or up to 2 days.
- Remove dough from fridge and unwrap. Roll into a roughly 12” circle between pieces of plastic wrap or waxed paper to a thickness of about 1/8” to ¼”. Fit crust into pan and trim edges. Prick bottom of crust with fork. Chill for 15 minutes. Preheat oven to 400 degrees F.
- Bake in preheated oven for 10 to 12 minutes or until crust feels set. Cool completely before filling.
Ghirardelli Brownie Half Recipe
Makes thin brownies in an 8” by 8” pan or standard thick brownies in a loaf pan or similar pan
Special equipment: microwave-safe mixing bowl, silicone spatula, mixing bowl, sieve or sifter, wooden spoon, baking pan, sprayed with baking spray, cooling rack
Preheat oven to 350 degrees F
Special equipment: microwave-safe mixing bowl, silicone spatula, mixing bowl, sieve or sifter, wooden spoon, baking pan, sprayed with baking spray, cooling rack
Preheat oven to 350 degrees F
- ½ cup (1 stick) butter, cut into large chunks
- 4 ounces semi-sweet chocolate, chopped or ¾ cup chocolate chips
- ¾ cup plus 2 tablespoons flour
- ¼ teaspoon baking powder
- ¼ teaspoon salt
- 1 cup brown sugar, lightly packed
- 1 teaspoon vanilla
- 2 eggs
- In microwave-safe mixing bowl, melt butter and chopped chocolate in microwave in 30 second intervals, stirring between heating. Stir until smooth.
- Sieve flour, baking powder, and salt into mixing bowl. Set aside.
- Using wooden spoon, stir brown sugar into chocolate mixture. Stir in vanilla and eggs. Stir just until smooth.
- Scrape into prepared pan and bake for 15 to 20 minutes, in 8” by 8” pan or 20 to 25 minutes in loaf pan. Cool in pan on cooling rack. Cut into squares. Brownies keep, tightly wrapped, at room temperature for a day or two. Freeze for longer storage.
Suggested Timeline:
- Make fudge, anytime from 3 hours to one week ahead.
- Make pie crust dough from 1 hour to 2 days ahead.
- On serving day, make the brownie batter, up to 30 minutes ahead.
- Assemble as directed below.
- Best served day they are made.
Layered White Chocolate Cherry Desserts aka Fudge Bottoms
Makes one 8" by 8” pan
Preheat oven to 350 degrees F
Special equipment: cutting board, rolling pin, small knife, 8” by 8” square pan, lined with parchment paper or foil, silicone spatula, cooling rack, chef’s knife to cut into squares or small circle and/or heart-shaped cutters
- 1 recipe Simple White Chocolate Fudge, cooked, chilled, and uncut
- 1 recipe Chocolate Pie Crust dough, chilled
- 1 recipe Ghirardelli Brownie Half Recipe, made up to Step #3 (uncooked batter)
- 1 recipe Basic powdered Sugar Glaze
- Turn out fudge onto a cutting board. Peel off parchment paper. Set aside.
- Roll out pie dough to a thickness of about 1/8” to ¼” trim to fit into bottom of prepared 8” by 8” pan. (Keep scraps to bake into wafers, if desired.)
- Fit fudge slab on top of pie dough, pressing lightly to nestle into the corners.
- Spread brownie batter over top of fudge with spatula. Bake for 30 to 35 minutes or until center is firm to the touch and completely set. These need to be baked longer than traditional chewy brownies in order to make clean cuts with knife or cutter.
- Cool on rack until completely cooled then chill for 2 to 3 hours until very firm. Turn out unto cutting board. Peel off parchment paper. If cutting into squares, glaze thinly with basic powdered sugar glaze. Chill until glaze is firm then cut into squares with chef’s knife. (If using cookie cutters, cut out circles and/or hearts then glaze each one with basic powdered sugar glaze.)
- Serve immediately or store in air-tight container. Best served the day they are baked but can be kept chilled for a day or two. I would not recommend freezing them.
Variation: If cutting into shapes, there will be leftover cut pieces and crumbs. These can be put into a food processor and lightly pulsed a few times to make sticky crumbs. These can be formed into balls by hand to make truffles or cake balls. Use small lollipop sticks to make cake pops. Chill balls until firm. Roll truffles in chopped, toasted nuts or cocoa. Cake pops can be dipped in basic powdered sugar glaze, setting on a rack to dry. Chill truffles or cake balls until serving time.
Basic Powdered Sugar Glaze
- 3 cups powdered sugar, sifted if lumpy
- 3 to 4 tablespoons water or milk
- food color to make pale pink
 |  |
In a mixing bowl, stir 3 tablespoons water into powdered sugar. Stir in more water, if needed. Color with drops of pink or red food color until desired shade of pink is reached. I like to make a fairly stiff glaze, then melt slightly in the microwave. The goal is to have the glaze set up and dry to the touch, when served.
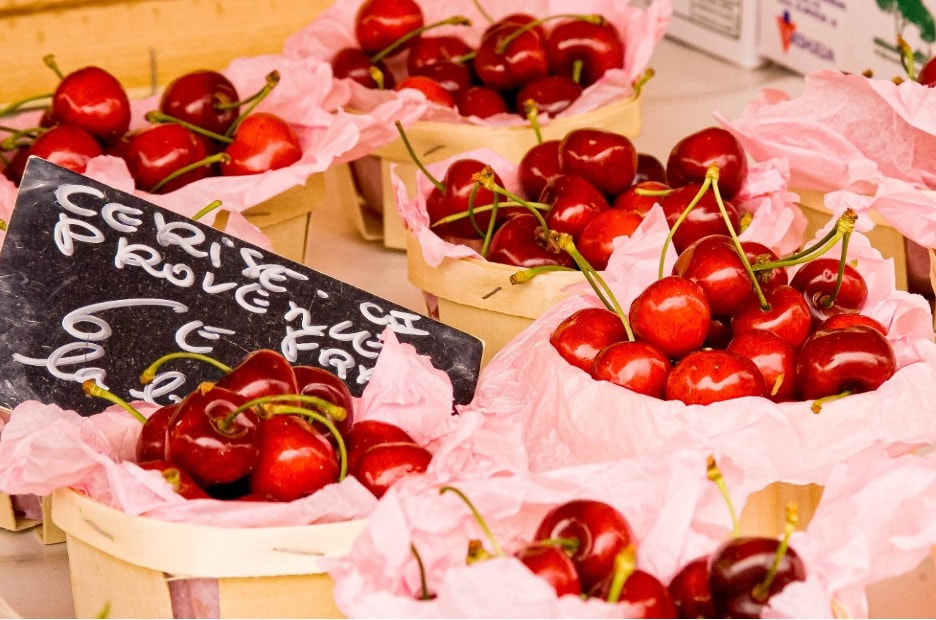
“Cerise, 2007 Paris Street Market” Paul Burkholder
 |  |
 RSS Feed